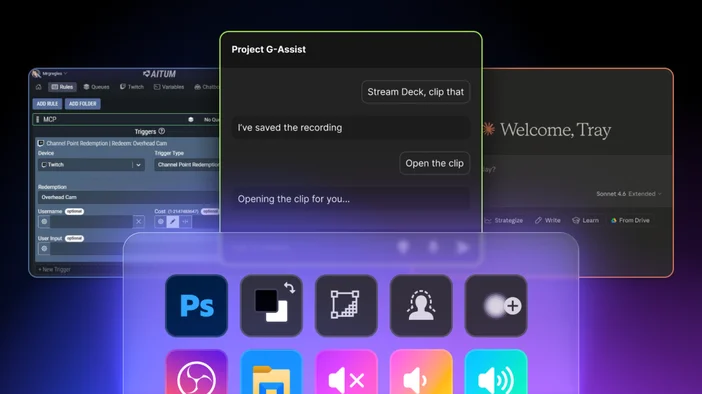
Stream Deck 7.4. opens up Stream Deck to AI assistants for the first time. With MCP support, AI tools can now connect to Stream Deck and trigger your actions, whether by voice, text, or even live events.
NVIDIA Project G-Assist is the first to connect, bringing voice control to Stream Deck. Say "get my stream ready" and it combines your actions to launch OBS, turn on your lights, start your music, and set your scene, all hands-free. Aitum, a popular automation platform for streamers, is also integrating, letting live events like raids and subscriptions trigger Stream Deck actions automatically. And because MCP is an open standard, more tools are on the way.
You still set up actions in Stream Deck app the same way you always have. MCP adds new ways to activate them. This guide walks through what MCP is, how to set it up, and how to start using it.
What is MCP
MCP stands for Model Context Protocol. It is an open standard that gives AI tools a shared way to connect to apps and services.
Think of it like USB. Before USB, every device needed its own type of cable and connector. USB created one standard that works with everything. MCP does the same thing for AI tools. Instead of each AI assistant needing a custom connection to each app, MCP gives them a common way to communicate.
With Stream Deck 7.4, Stream Deck joins that list. AI provides the input. Stream Deck provides the actions.
What you can do with it
MCP is at its best when you want to combine actions or stay hands-free.
With NVIDIA Project G-Assist, your voice tells Stream Deck what to do. Say "get my stream ready" and Project G-Assist can combine your actions to open OBS, set your scene, turn on your lights, and start your music. Your hands never leave the keyboard and mouse, and you never need to look away from what you are doing.
With Aitum, live events on your stream do the triggering instead of you. A raid comes in and your actions combine to switch scenes, dim the lights, and play a welcome sound. A channel point redemption activates a voice effect. A subscription kicks off a shoutout in Discord. These actions are trigger in real time without you doing anything.
Set up MCP Actions in Stream Deck
- Open Stream Deck app.
- Go to Preferences and select the General tab.
- Enable MCP Deck.
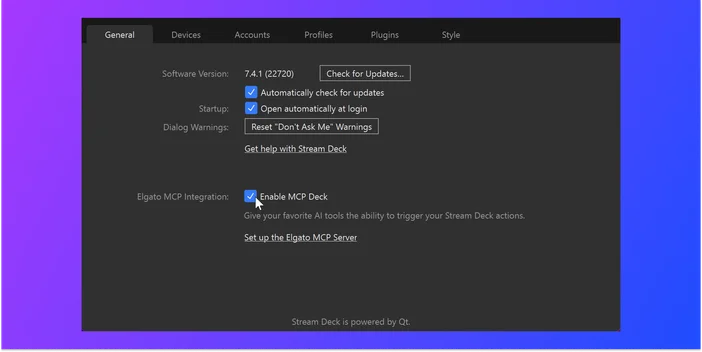
This creates a dedicated profile called MCP Actions, which you can find in the profile dropdown at the top of Stream Deck app.
Drag actions onto its keys from the action panel on the right, just like you would with any other profile. Any action you place here becomes available to connected AI tools. Actions on your other profiles stay private, so you control exactly what the AI can access.
Note: Don't see Elgato MCP Integration in Preferences? Make sure you're running Stream Deck 7.4 or later. Download the latest version here.
Add descriptions to your actions
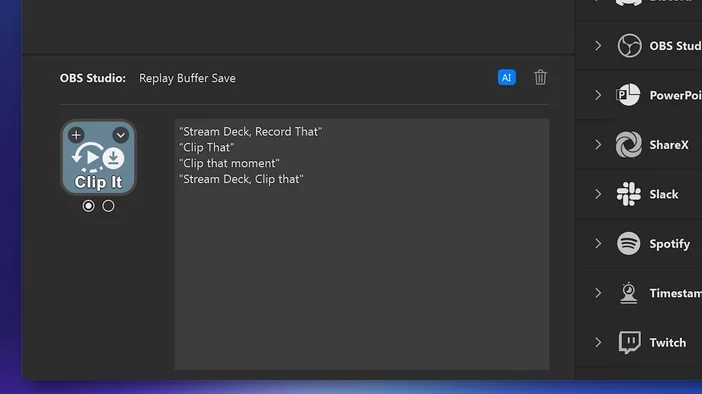
Each action on the MCP Actions profile has a description field that tells the AI what the action does and when to use it. This is one of the most important parts of the setup, because it is how the AI decides which action to trigger when you make a request.
To add a description, select an action, tap the AI button, and enter the phrases you'd naturally say.
Connect NVIDIA Project G-Assist to Stream Deck
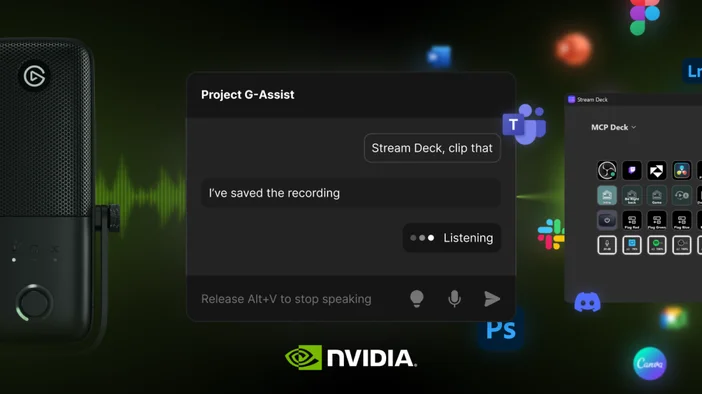
NVIDIA Project G-Assist connects to Stream Deck automatically once MCP Deck is enabled.
Connect Claude Desktop to Stream Deck
If you use Claude Desktop or another text-based AI tool, you can also connect it to Stream Deck through MCP. The steps below walk through Claude Desktop specifically.
Edit the configuration file
Claude Desktop stores its MCP connections in a configuration file. You need to add Elgato MCP Server to this file so Claude knows where to find it.
- Open Claude Desktop.
- Go to Settings, then Developer, then click Edit Config. This opens the folder where the configuration file is stored.
- Find claude_desktop_config.json in that folder. Right-click it and open it with a text editor (Notepad on Windows, TextEdit on macOS).
- The file will already have some content. You need to add an mcpServers entry inside the existing structure, not as a separate block underneath.
Find the last } that closes an existing section. Add a comma after it, then add the mcpServers section before the final closing }.
Here is what a typical file looks like after the edit:
Everything must stay inside one set of outer curly braces `{ }`, with a comma between each section. If the `mcpServers` block gets pasted as a separate object below the existing content, Claude Desktop will show an error on startup.
If the file is empty or only contains `{}`, you can replace everything with:
5. Save the file and fully quit Claude Desktop (not just close the window). On macOS, right-click the dock icon and select Quit.
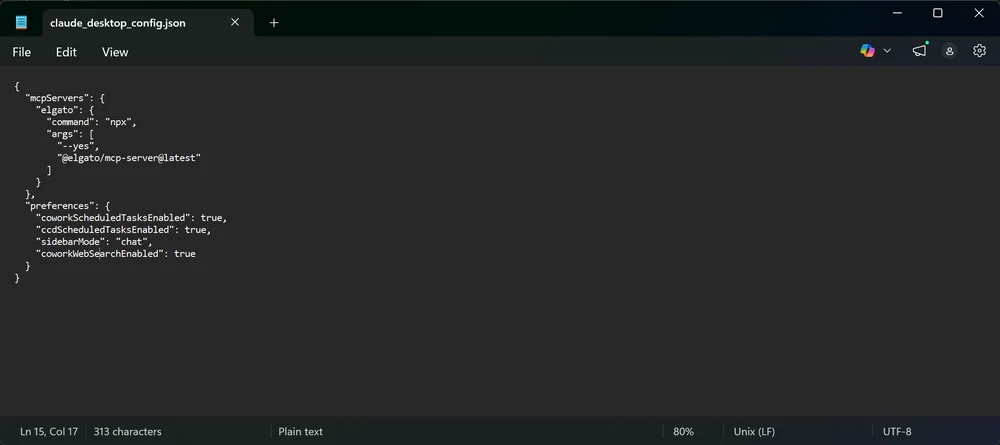
Example of Claude config file.
Confirm the connection
To verify everything is working, go to Settings, then Developer. Under Local MCP servers, you should see elgato listed with a green running label.
If it does not appear or does not show as running, double-check that Stream Deck app is open with MCP Actions enabled, and that the configuration file was saved correctly. Then fully quit and reopen Claude Desktop.
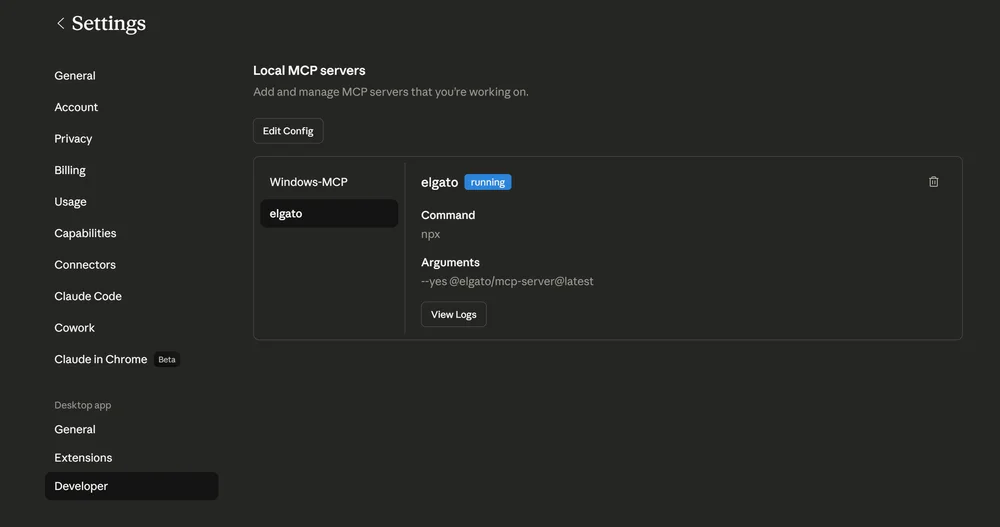
If it does not appear or does not show as running, double-check that Stream Deck app is open with MCP Actions enabled, and that the configuration file was saved correctly. Then fully quit and reopen Claude Desktop.
Connect other AI tools
NVIDIA Project G-Assist and Claude Desktop are two of the first to connect, but because MCP is an open standard, any compatible tool can plug in the same way. Each one inherits Stream Deck's full ecosystem of integrations, plugins, and workflows.
For full setup details, additional connection methods, and advanced configuration, visit the Elgato MCP Server page on npm.
Troubleshooting
If an action does not trigger, check the following:
- Stream Deck app is running and Enable MCP Deck is checked in Preferences.
- The action is on the MCP Actions profile, not a different profile.
- Check if your AI tool is connected to Elgato MCP Server.
Wrap-up
MCP support in Stream Deck 7.4 is a first step toward deeper AI connectivity. Project G-Assist and Aitum are the first to connect, but because MCP is an open standard, they will not be the last. AI provides the input. Stream Deck provides the actions. And as more tools connect, the possibilities keep growing.
The more actions you have set up in Stream Deck, the more any connected AI tool can do with them. Explore plugins on Elgato Marketplace to expand what is possible.
PRODUCTS IN ARTICLE