This guide will explain the process for recording console gameplay using Elgato Game Capture 4K S.
Besides a console and 4K S, you will need:
- Two HDMI Cables. Your console should include an HDMI cable and Game Capture 4K S includes an HDMI 2.0 cable in the box.
- A USB 3.0 (5Gbps) or faster Type-C cable. A USB Type-C to Type-C cable is included with 4K S.
- A Mac or PC that meets the system requirements. See if your computer meets the requirements: [Once this is live on help.elgato.com]
First step is connecting everything together
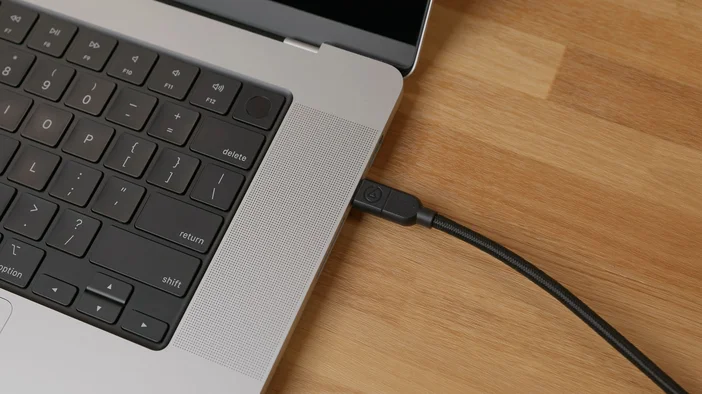
1. First, ensure your 4K S is powered on by being connected to a USB 3.0 or faster port on your PC or Mac. This could also be a Thunderbolt 3 or 4 port. Use the included Elgato USB Type-C to Type-C cable.
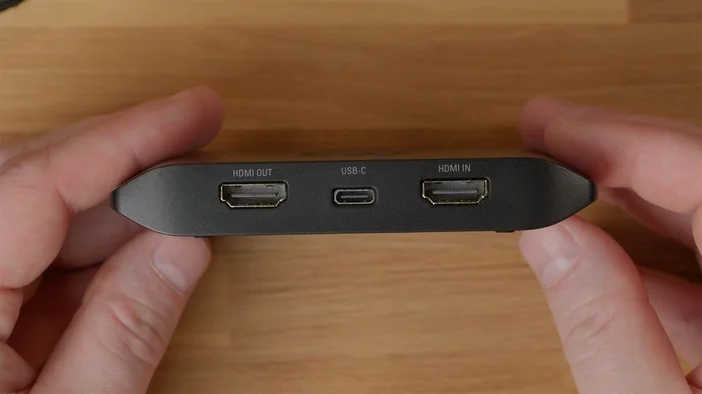
2. Next, connect an HDMI cable from the HDMI OUT port on your 4K S to the HDMI port on your TV you normally play on.
3. Connect a second HDMI cable from your console's HDMI port to the HDMI IN port on your 4K S. They will be clearly labeled.
4. Lastly, power on your console.
Audio Check Up
Some console such as PlayStation 5 and Switch 2 cannot send sound to your capture card and to your headphones. If you're playing with headphones and a headset, this might be why you have no sound being captured or sent to your TV. You will need to disconnect your headphones and listen to the audio preview from your capture or streaming app.
A zero latency option is Chat Link Pro. This special splitter sends audio from the console to both your wired headset and your capture card, while still sending your microphone audio to the console. Find out here if Chat Link Pro is what you need.
To begin recording your gameplay right away, download and install Elgato Studio from https://www.elgato.com/s/downloads It's available for both Windows and macOS.
Second step is configuring your software
With everything connected and your console powered on, open Elgato Studio on your computer and in a few seconds you'll see the preview from the console or source.
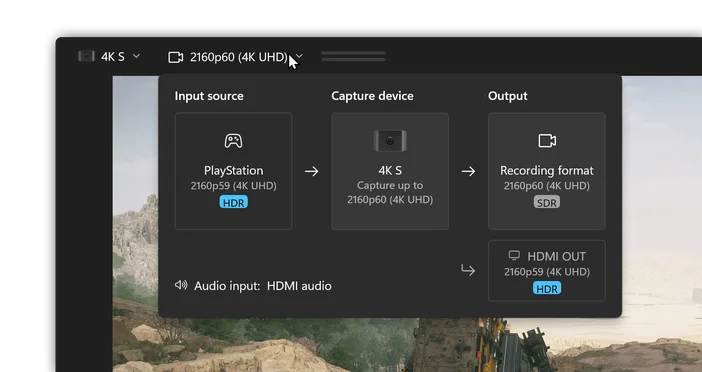
On the top left, you will see your 4K S listed and the current recording resolution and framerate. Click to see a signal path of your source, capture card, recording format, and even the signal going to your monitor.
Start Recording
Click on the record button at the bottom and you're capturing. You'll then see a timer counting how long you've been recording and the current filesize. Click again to stop recording. Elgato Studio by default will capture at the highest resolution and framerate supported by the source and 4K S.

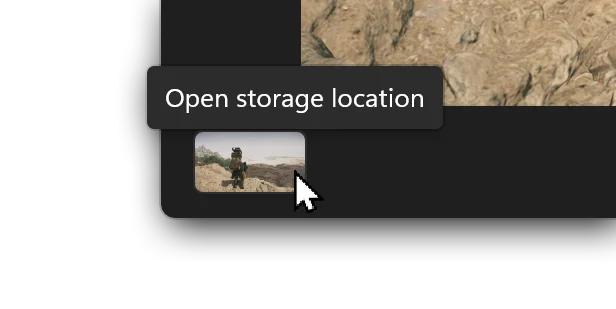
Next to the record button is the Snapshot button. Click on this to save a screenshot from your capture and store it next to your videos.
Over on the bottom left is a quick shortcut to access your saved recordings and images, wherever you set the recording location. More on that down below.
After you stop recording, your video file is ready to be uploaded right into YouTube or imported into an editing app to be turned into some epic highlights.
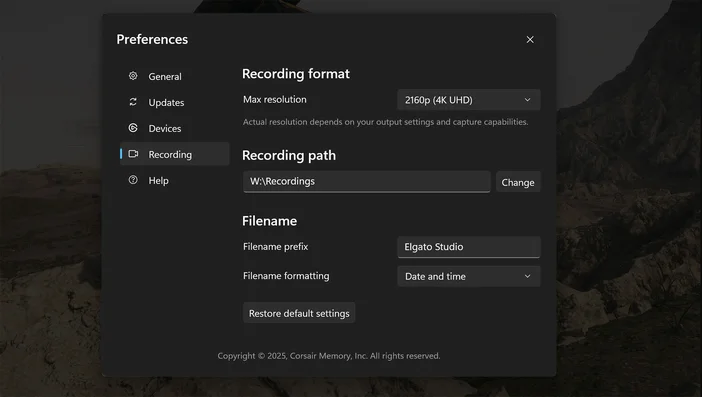
Changing Recording Settings
Changing recording resolution and location is easy. Head into preferences by clicking on the Gear Cog icon on the top right, then go to the Recording tab. You can also click on the resolution preview on the top left, then click on the Recording Tile.
Recording format
Here you can choose the maximum resolution and framerate to record at.
Keep in mind that the final video will be the lower resolution between the console and Game Capture 4K S. For example, recording a PlayStation 4 with 4K S may result in recording at 1080p at 60fps even though 4K S supports capturing 4K at 60fps.
Recording path
Here you can choose where your videos are saved. We recommend you set this to a fast SSD.
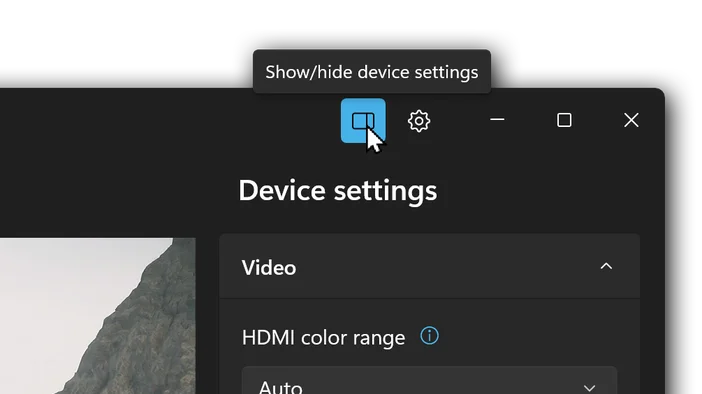
Changing Audio Input for Chat Link Pro
We recommend listening to the real-time audio preview from Elgato Studio for the simplest setup. If you want a zero-latency gameplay experience and using Chat Link Pro, you will need to change the audio input on your capture card.
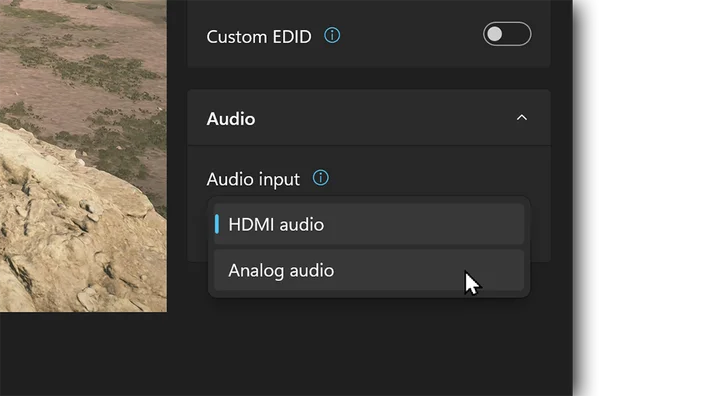
Inside Elgato Studio, go into the Device Settings sidebar on the top right.
Here, change Audio Input from HDMI Audio to Analog Audio. Once set, the setting is saved and you can close the sidebar.
You're now all set to record gameplay using Game Capture 4K S and Elgato Studio.
Need some more help setting up?
Check out our 4K S setup videos over on YouTube or contact Elgato Support