Digital audio professionals have leveraged VST Audio Effects to clean up, shape, and customize sound and music in their work for decades. From Equalizers, Compressors, Reverb, to Denoising, Distortion, and De-essers. And now there are countless options available for creators and streamers to use in their content and production.
We'll show how to download and install VST3 Audio Effects from Marketplace and use them in your favorite apps.
Throughout this article, we'll be installing Voice Focus as an example, which uses the power of AI and Machine Learning to intelligently separate your voice from background noise and reverb while also enhancing its quality at the same time.
Downloading Audio Effects From Marketplace
For free Audio Effects, click 'Get' on the product page. This assigns it to your Marketplace account and begins the download through Wave Link if you have the app installed. Clicking on 'Open in Wave Link' begins the download process again.
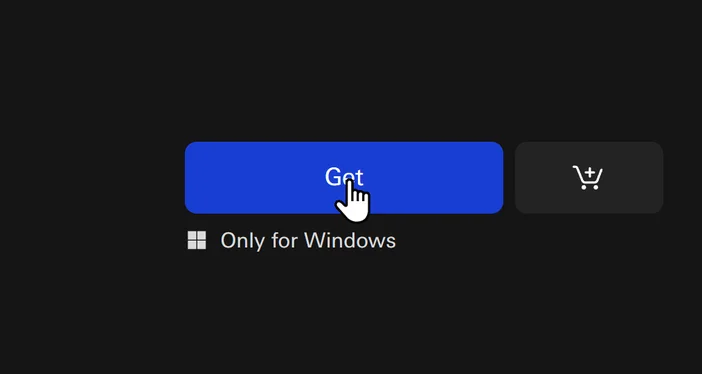
Free Audio Effects show a Get button to download
For purchasable Audio Effects, such as Voice Focus, completing the purchase process will allow you to manually download the Audio Effect or download through Elgato Wave Link. You will also be provided the license key at this time to enter into the Audio Effect's control panel for activation. More on this in the next chapter.
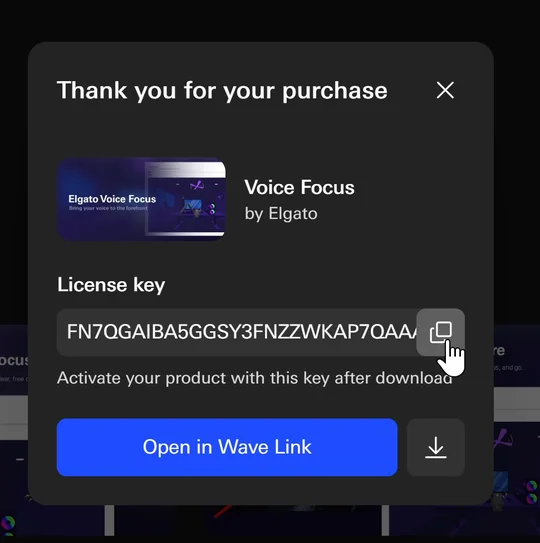
Post-purchase shows License Key and a button to download in browser
If you do not have Wave Link installed, you can download the Audio Effect through your browser using the steps below.
Retrieve License Keys And Manually Downloading
- Click on your profile image on the top right and click on Manage your account.
- Click on Products on the left.
- Click on VST to filter down to Audio Effects only.
- Click on the card for Voice Focus.
Here you will see your order info including the License Key and a button to download the Audio Effect file directly. Whether that is a .vst3 for Windows or .au for specific macOS apps.
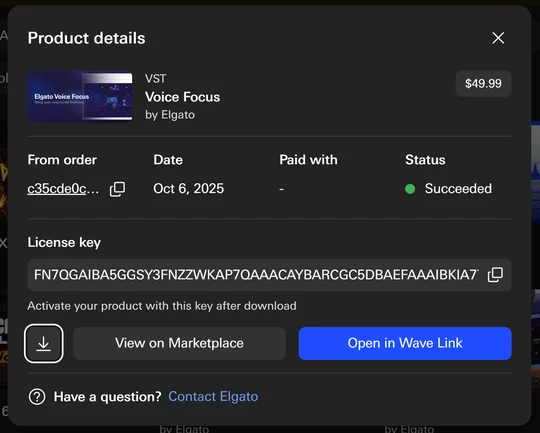
Product details under Products in Account
Installing Audio Effects on Windows 11
After downloading the Audio Effect manually, you will need to place it in C:\Program Files\Common Files\VST3 for other apps including Wave Link to access it normally.
If you have Elgato Wave Link installed, then the process of downloading and installing an Audio Effect is as easy as clicking on Open in Wave Link. Using Open in Wave Link take care of this process for you automatically.
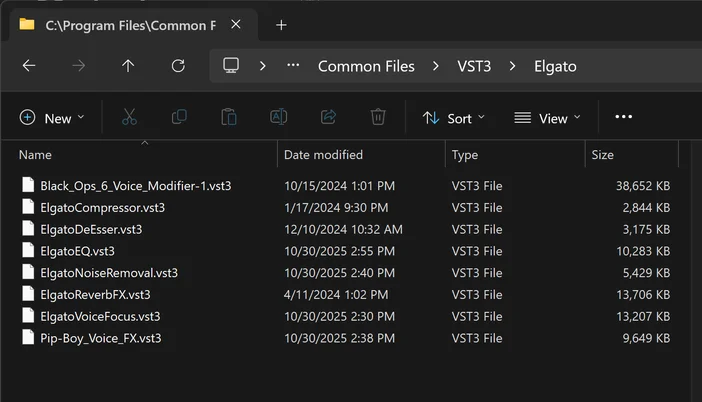
VST3 Audio Effects placed in the proper Windows directory
Installing Audio Effects on macOS
On macOS, take your .VST3 or .AU files and place them in ~/Library/Audio/Plug-Ins/Components
An easy way to reach this directory is to open up Finder, then head up to Go > Go to Folder or press Shift + ⌘ + G to open the Go to Folder dialogue. Here, enter the address shown above and drag your .VST3 or .AU files to install them for other apps to use.

Go to Folder in Finder
Using Audio Effects inside of Elgato Wave Link
With the Audio Effect installed, it's time to use in them in audio apps. On start, Wave Link will search for new Audio Effects and enable them for you. All you need to do it open an Input Channel's effects menu and add your new Audio Effect.
Adding Audio Effects to OBS Studio
Follow our full walkthrough on adding VST3 audio effects to OBS Studio.How to use VST3 Plugins in OBS StudioHow to use VST3 Plugins in OBS Studio

Adding Audio Effects to Adobe Audition
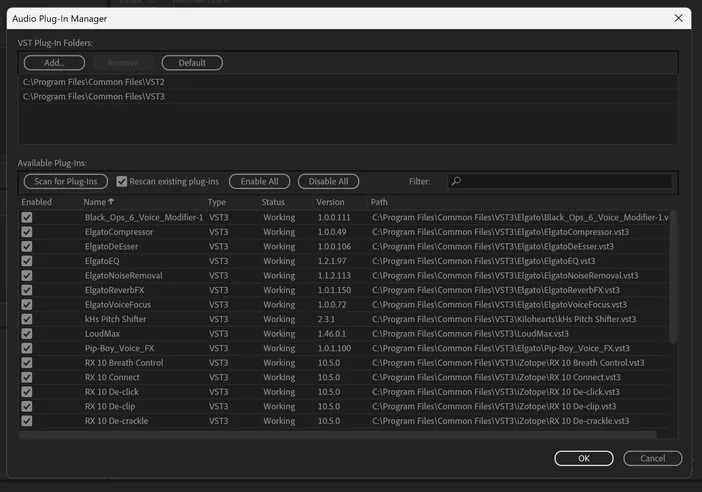
Audio Plug-in Manager showing scanned Audio Effects
- Go to Effects menu > Audio Plug-in Manager.
- Make sure the appropriate directory is added into VST Plug-In Folders.
- Windows: C:\Program Files\Common Files\VST3
- macOS: ~/Library/Audio/Plug-Ins/Components
- Click on Scan for Plug-Ins.
- Your new Audio Effect will appear as enabled in the bottom list.
You can now access your new VST or AU from Effects menu > VST3

Process for adding Audio Effect to a file in Audition
Adding Audio Effects to Adobe Premiere Pro
The process is very similar for Premiere Pro.
- Go to Preferences, then Audio settings, and then Manage Audio Plug-Ins...
- Make sure the appropriate directory is added into VST Plug-In Folders.
- Windows: C:\Program FIles\Common Files\VST3
- macOS: ~/Library/Audio/Plug-Ins/Components
- Click on Scan for Plug-Ins.
- Your new Audio Effect will appear as enabled in the bottom list.
Adding Audio Effects to Audacity
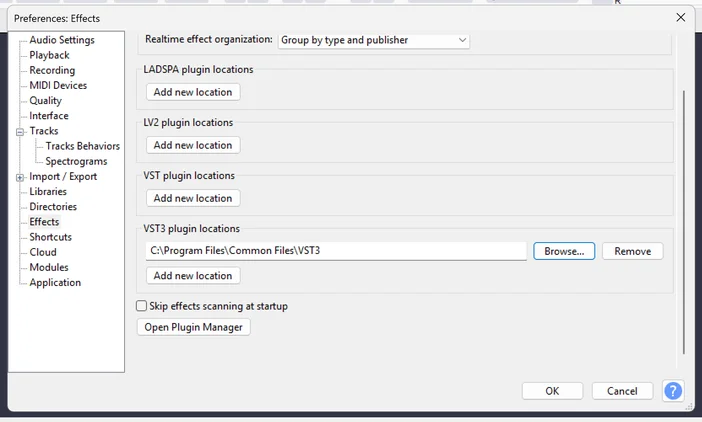
Audacity's Audio Plugin Manager options
By default Audacity will scan default folders such as the VST3 folder on Windows and Components folder on macOS. You can manually scan for new plugins in custom directories by
- Going into Edit > Preferences
- Go to the Effect settings
- Under VST3 plugin locations, add
- Windows: C:\Program Files\Common Files\VST3
- macOS: ~/Library/Audio/Plug-Ins/Components
- At the bottom open Audio Plugin Manager.
- Click on Rescan. When your new Audio Effect is found, make sure it's enabled and click OK to close out of this window.
You can now access your new VST or AU from Effects menu.
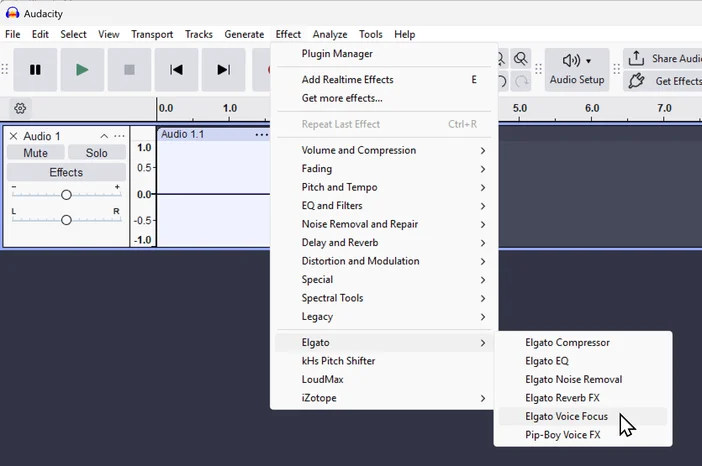
Adding Voice Focus to Audio file in Audacity
Explore More Audio Effects
You can find plenty more Audio Effects from Elgato and Community Makers over on Marketplace.