MANUALES | GUÍA DE INICIO RÁPIDO
Elgato Prompter — Quick Start Guide
Section 1: Connecting Your Camera
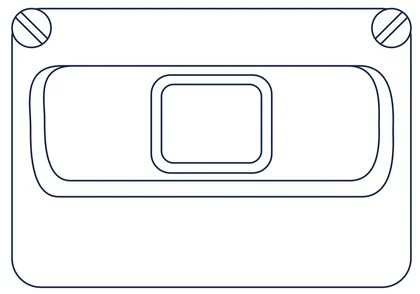
Elgato Prompter includes interchangeable backplates to accommodate different types of cameras/webcams. The goal of backplates is to block surrounding light on the backside of prompter to prevent glare and to optimally reflect Prompter’s monitor.

Ring backplate
For larger DSLR/Mirrorless cameras or camcorders with threaded lenses.
⚠️ Do not use with motorized lenses.
Facecam Pro backplate
For use with Elgato Facecam Pro.
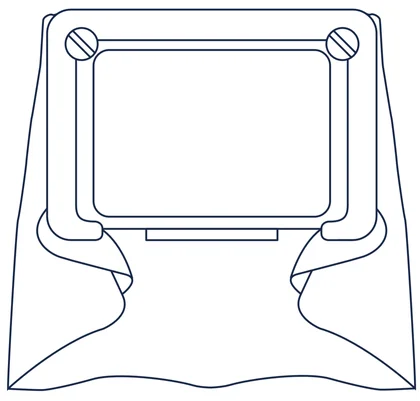
Universal shroud backplate
For other cameras, camcorders, and webcams that do not meet the criteria for the ring backplate or Facecam Pro backplate.
Note: Do not use with motorized lenses.
Visit https://elgato.com/s/compatbility/prompter to see a list of tested and compatible cameras, camcorders, and webcams for Elgato Prompter. More backplates may become available to support different webcams and cameras (sold separately). Visit Elgato.com to see the list of available backplates.
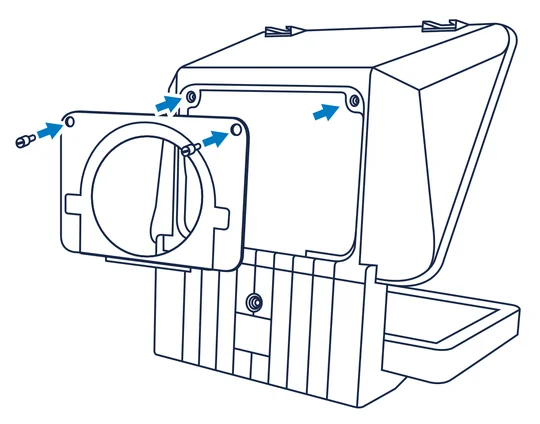
Connecting the Ring Backplate
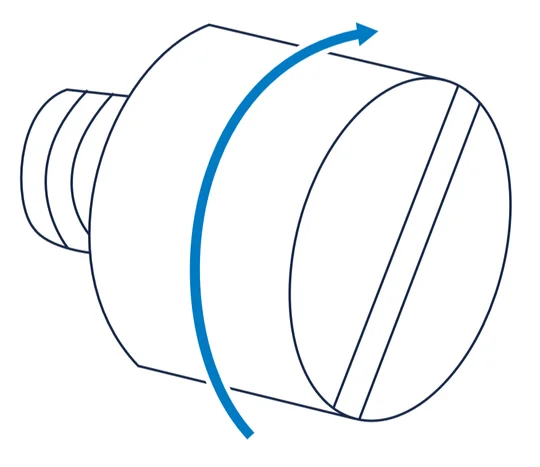
Seat the ring backplate into the back of Prompter. There is a tab at the bottom of the opening to help guide the backplate. Fasten the ring backplate with the 2 thumbscrews.
On your camera, attach the appropriate step-up ring included with Prompter by screwing it onto the camera lens threads. Camera lenses with 49, 52, 55, 58, 62, 67, 72, 77, and 82 mm sized threads are compatible with this setup.
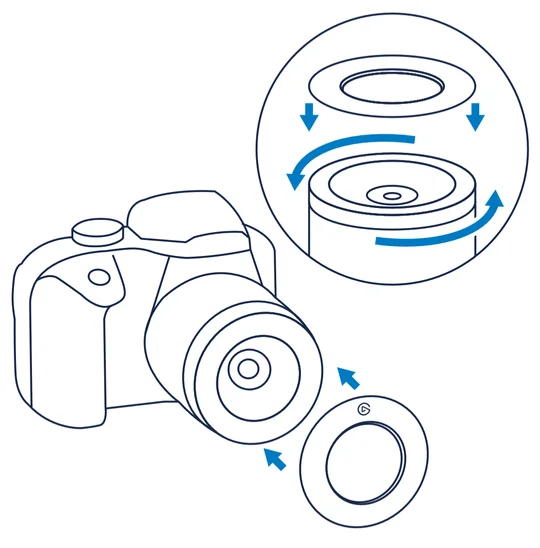
Quick Tip: Check your camera’s lens cap to see its thread size.
Once the step up ring is fully screwed on, Elgato Prompter is ready to dock onto your camera. Line up the rails of the ring backplate with the step-up ring on the camera, and slide it on until it’s fully seated and secure.
Notes: If you are using a short lens, you can use the L-bracket to support stability.
Your Prompter is now ready to be mounted (see Section 2).
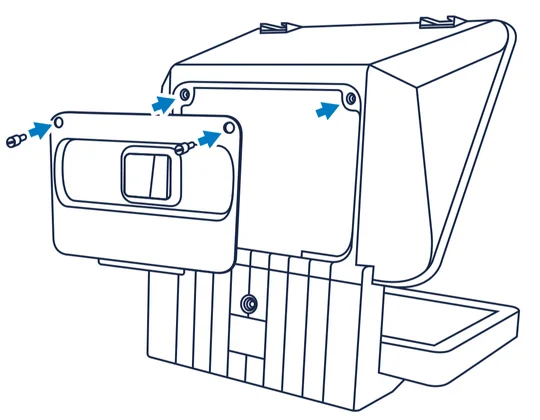
Connecting the Facecam Pro Backplate
Seat the Facecam Pro backplate into the back of Prompter. There is a tab at the bottom of the opening to help guide the backplate. Fasten the Facecam Pro backplate with the 2 thumbscrews.
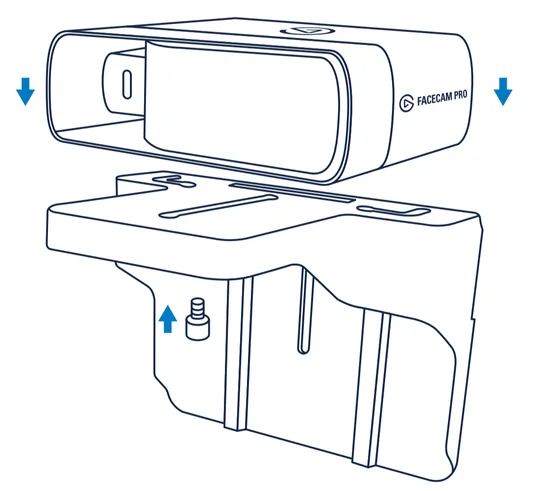
If Facecam Pro has its monitor mount attached, remove it before proceeding.

Attach Facecam Pro to the camera L bracket using the provided thumbscrew. Do not tighten it fully.
Attach the camera L bracket onto Prompter using the provided thumbscrew. Do not tighten it fully.
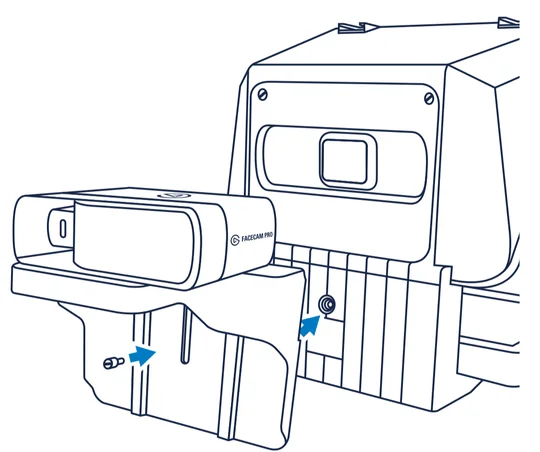
Raise the camera L bracket so Facecam Pro is level with the mold of the Facecam Pro backplate and push the Facecam Pro forward to seat it into the backplate fully.
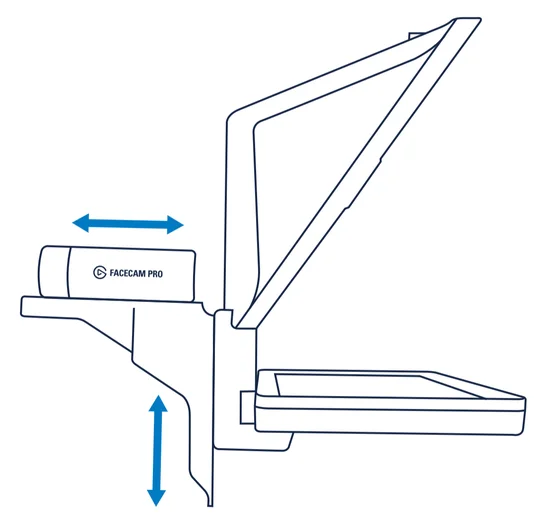
Once fully seated, tighten the 2 thumbscrews to secure Facecam Pro to the Facecam Pro bracket and to secure the camera L bracket to Prompter.
Your Prompter is now ready to be mounted (see Section 2).
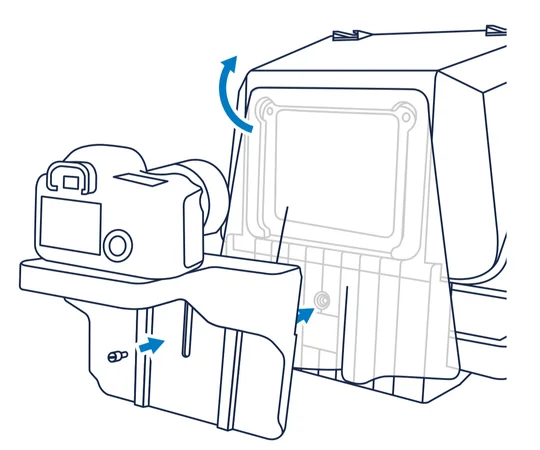
Connecting the Universal Shroud Backplate
Seat the universal shroud backplate into the back of Prompter. There is a tab at the bottom of the opening to help guide the backplate. Fasten the universal shroud backplate with the 2 thumbscrews.
Attach the camera to the camera L bracket using the provided thumbscrew. Do not tighten it fully.
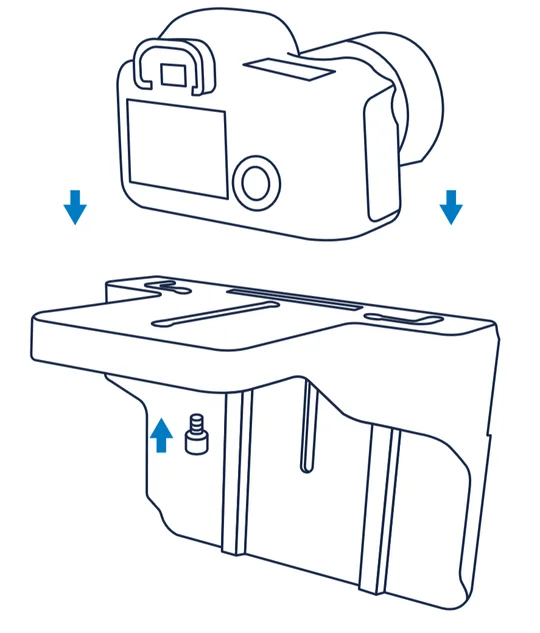
Note: The camera must have a ¼” thread in order to mount it onto the camera L bracket.
After lifting up the shroud for access, attach the camera L bracket onto Prompter using the provided thumbscrew. Do not tighten it fully. Drape the shroud over your camera.
Lift the camera L bracket so the camera’s lens is centered in Prompter’s opening. Once centered, fully tighten the camera L bracket to Prompter.
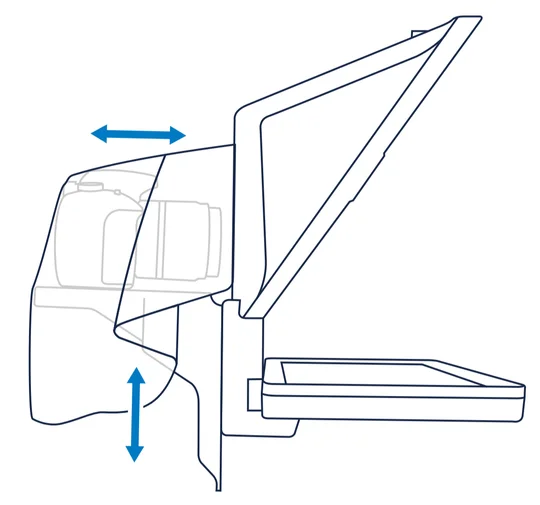
Move your camera as far forward as possible without hitting the glass on Prompter.
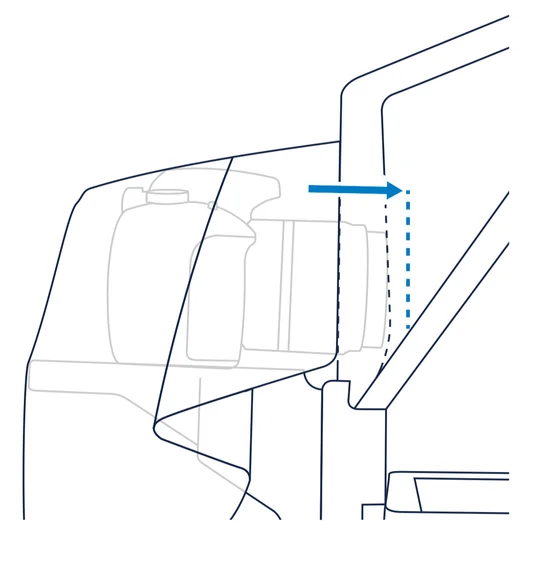
Note: Certain cameras have lenses that can protrude when zooming. Ensure that your camera’s lens will not touch Prompter’s glass to prevent possible damage during use.
Once the camera is positioned properly, fully tighten the thumbscrew to secure the camera onto the camera L bracket. Drape the shroud over your camera.
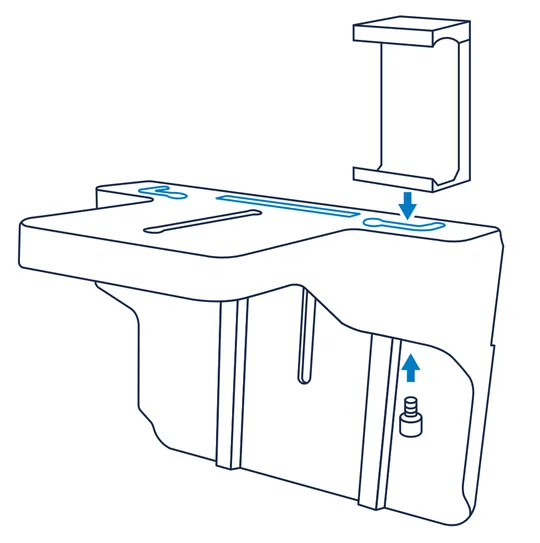
The camera L bracket has multiple thumbscrew rails to accommodate different types of webcams and cameras (sold separately). The left and right L rails enable you to mount a smartphone clamp so you can use a smartphone with Elgato Prompter.
Section 2: Mounting Elgato Prompter
Elgato Prompter has multiple mounting points depending on the type of configuration you set up in Section 1. Ensure that your tripod or other mounting device is able to support the weight of Elgato Prompter and your camera.
Facecam Pro Backplate
Complete the procedure in Section 1.
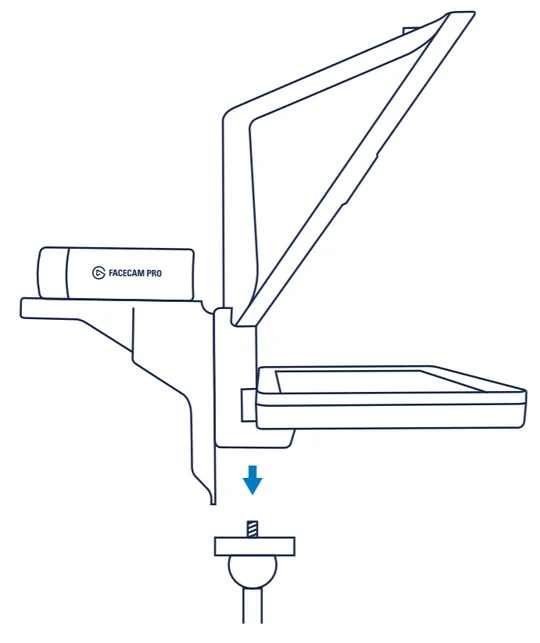
Use the center ¼” mount on Prompter and screw it onto your tripod or other mount.
Universal Shroud Backplate
Complete the procedure in Section 1.
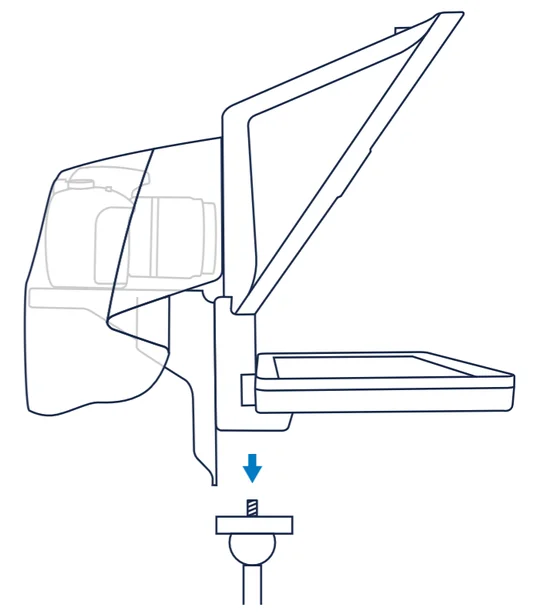
Use the center ¼” mount on Prompter and screw it onto your tripod or other mount.
If you are using accessories mounted on Prompter (see Section 3), you might want to use the ¼” mount located beneath Prompter’s display.
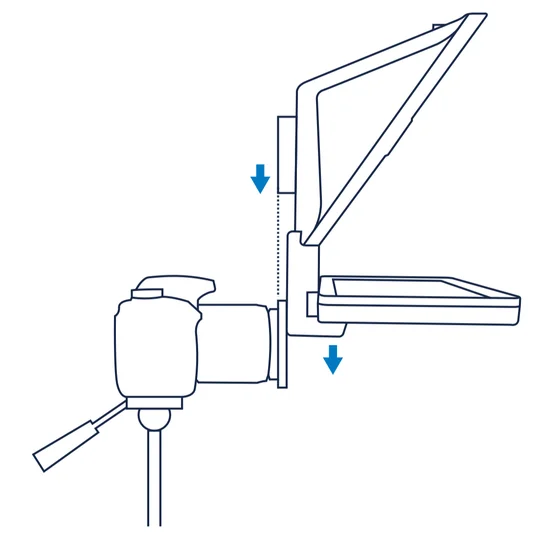
Ring Backplate
Complete the procedure in Section 1.

Mount your camera or camcorder onto your tripod or mount of choice. Make sure your ball head is tightened fully and secure.

Slide Prompter onto the step-up ring attached to your camera’s lens to dock.
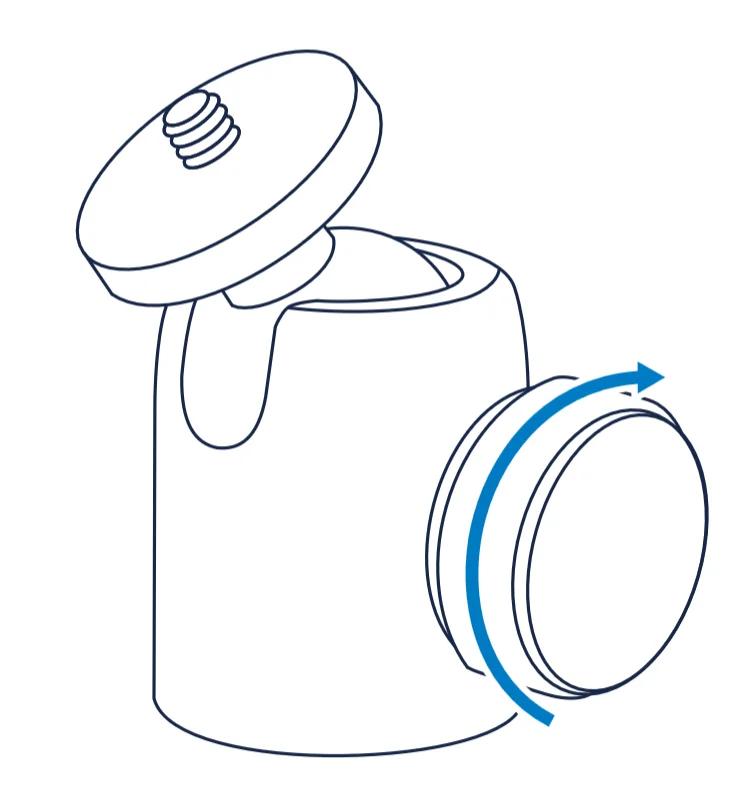
Double-check that the ball head is still fully tightened and is able to support the weight of Prompter and the camera.
If your ball head is unable to support the weight of this setup, you can use the additional ¼” mounts found on Prompter with additional accessories to help support the system (see Section 3).
Section 3: Connecting to your Computer
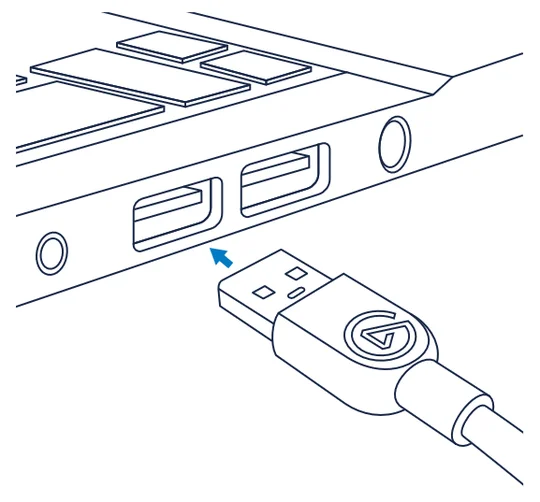
Elgato Prompter connects to Mac or Windows computers with a single USB-C cable for data and power.
Plug the USB-C right angle plug into Prompter so it is angled downward.
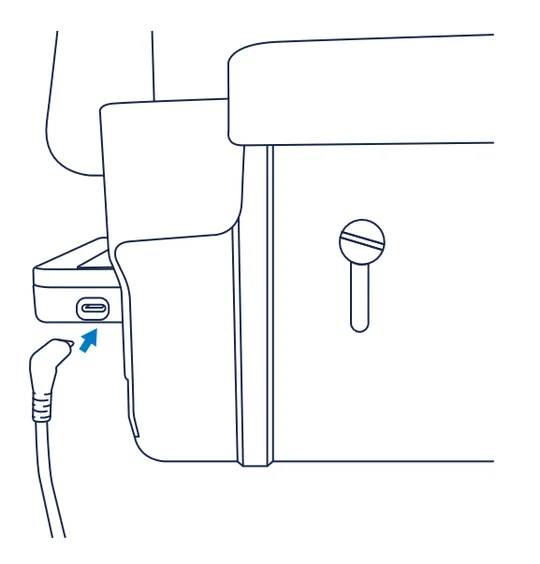
Plug the other end of this cable into an available USB 3.0 port on your computer.
Section 4: Software
Visit http://elgato.com/downloads to download Elgato apps for Windows and Mac.

Download and install Camera Hub for necessary DisplayLink drivers as well as software features for Prompter:
- Free teleprompting software
- Free Twitch Chat reading software
For Android, download the DisplayLink Presenter app from the Play Store.
Section 5: Accessorizing Elgato Prompter
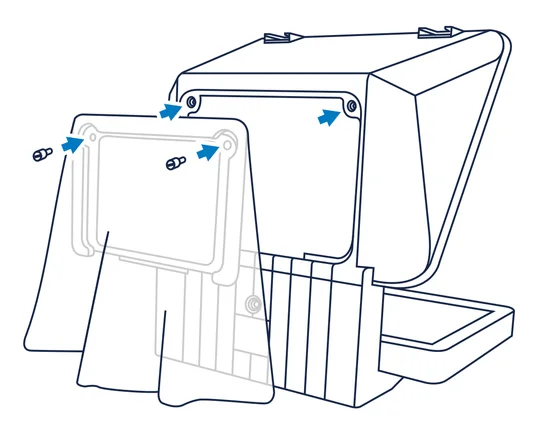
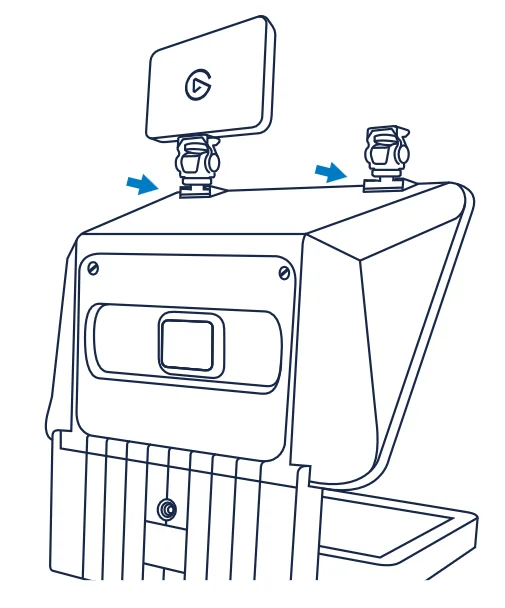
Coldshoe Mounts
Elgato Prompter features 2 cold shoe mounts that enable you to mount additional accessories, such as lights, microphones, field monitors, and so on. Attaching accessories to Prompter will increase the weight of the entire system, and might place greater front weight to Prompter. Make sure your mount’s ball head can support this. If not, read the following section.
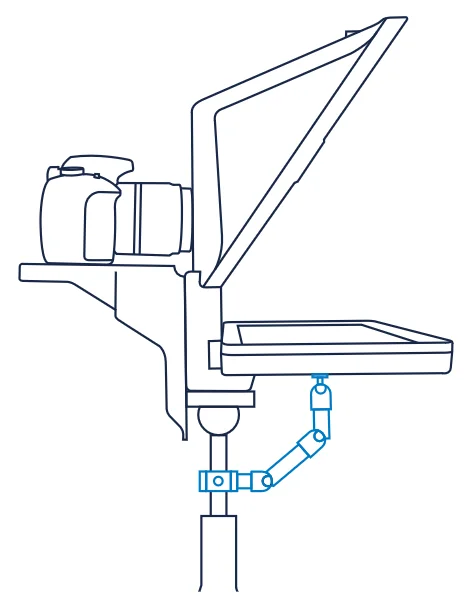
Additional ¼” Mounts
If your ball head is unable to support the weight of your Prompter system and possible accessories, you can use the additional ¼” mounts found on the bottom of Prompter to provide additional support. For example, you could use Elgato Heavy Clamp and Flex Arm to add a support brace by attaching to the ¼” thread under Prompter’s display, and then attach the clamp to your tripod, multi mount, or other mounting device.
Slide Prompter onto the step-up ring attached to your camera’s lens to dock.
If your ball head is unable to support the weight of your Prompter system and possible accessories, you can use the additional ¼” mounts found on the bottom of Prompter to provide additional support. For example, you could use Elgato Heavy Clamp and Flex Arm to add a support brace by attaching to the ¼” thread under Prompter’s display, and then attach the clamp to your tripod, multi mount, or other mounting device.