Deixe a sua Facecam 4K com a melhor aparência possível com alguns passos simples. Vamos guiá-lo passo a passo para otimizar a Facecam 4K. Desde iluminação e exposição até redução de ruído, balanço de branco e efeitos dentro do Camera Hub.
Assista ao vídeo guia
Prefere ver tudo em ação? Assista ao nosso tutorial completo sobre como obter a melhor imagem com a Facecam 4K.
Comparação fora da caixa
Como referência, aqui está a Facecam 4K com iluminação normal da sala e todas as opções automáticas padrão, em comparação com o resultado final com todos os ajustes.


Configurações padrão com iluminação típica da sala.
Iluminação melhorada e todas as configurações manuais e efeitos de fundo de IA.
A iluminação é importante
As câmaras só conseguem ver se houver luz de qualidade suficiente, tornando a iluminação da sua configuração o fator mais importante quando se trata da qualidade da câmara. A maioria das pessoas pode simplesmente confiar nas luzes embutidas no teto, num candeeiro ou talvez até mesmo na luz proveniente do monitor.
No entanto, as luzes de um candeeiro ou de um ventilador no teto não são projetadas para vídeo. E a sua posição faz com que projetem sombras fortes sobre si. Elas podem ter uma tonalidade de cor estranha ou piscar. O seu monitor, embora emita alguma luz, não é muito brilhante e a sua emissão de luz e cor mudam dependendo do que está a ser exibido. Mude para o modo escuro e ficará nas sombras. Abra uma nova guia no navegador e poderá ficar completamente apagado.
Em vez disso, pense como um estúdio onde tem muita iluminação consistente que pode controlar. Adicione luzes principais para iluminar o seu rosto. Adicione alguma iluminação prática para dar cor e brilho ao fundo. E, finalmente, talvez alguma iluminação de destaque, como uma luz RGB a incidir sobre si de lado para iluminar as suas bordas, separando-o do fundo.


Com tudo isso adicionado e a iluminação inadequada desligada ou reduzida, a Facecam 4K pode brilhar com resultados muito melhores.
Exposição automática e ISO
Com a imagem original típica de iluminação vista de cima, a Facecam 4K tem a difícil tarefa de manter o objeto no nível de exposição correto com a iluminação limitada. Por esse motivo, ela precisa funcionar com mais de 4.000 ISO. Isso é muito mais alto do que desejamos. Com as luzes principais, a iluminação de destaque e as luzes práticas, a Facecam 4K fica em torno de 750 ISO. Muito melhor.
ISO é uma medida ou classificação da sensibilidade de um sensor. Um ISO mais alto proporciona uma imagem mais clara, mas com mais ruído. É como o ganho de um microfone. Um ganho mais alto aumenta o volume, mas adiciona ruído ao sinal. O mesmo acontece com os sensores das câmaras. Para manter o ISO mais baixo, por exemplo, abaixo de 1000, basta ter mais luz na cena.
A exposição automática da Facecam 4K é inteligente o suficiente para a grande maioria das situações, mas pode ser necessário ajustá-la um pouco, dependendo do ambiente.
- Medição:
- Ponderação central: esta opção dá prioridade ao centro do enquadramento. Onde normalmente estaria.
- Média: esta opção equilibra o brilho em todo o quadro
- Compensação: controle até ±3 pontos para tornar a sua imagem consistentemente mais clara ou mais escura, mesmo com as mudanças da luz natural ao longo do dia.
- Gama dinâmica:
- Mude de Padrão para Amplo para manter os realces, ao mesmo tempo que aumenta as sombras em ambientes de alto contraste, mantendo os 60 fps.
- Alta gama dinâmica (HDR): No hardware da Facecam 4K, o sensor alterna entre claro e escuro e, em seguida, combina cada dois fotogramas com um algoritmo especial para reter mais informações de luz na sua cena. Como utiliza pares de fotogramas, a taxa de fotogramas máxima é de 30 fps. O hardware da Facecam 4K opera internamente a 60 fps.

Faixa dinâmica padrão

Ampla gama dinâmica

Alta gama dinâmica
Bloqueio: velocidade do obturador e ISO
Para obter controlo total, desative a exposição automática e passe para o modo manual. O modo manual é ideal se as suas luzes principais forem estáticas, mas as luzes de realce (como fitas LED) continuarem a mudar, impedindo que elas interfiram na sua exposição.
O controlo manual ainda permite controlar a gama dinâmica, além de oferecer controlo da velocidade do obturador e ISO.
- Velocidade do obturador: ajustável de 1/10.000 de segundo a 1/10 de segundo. Para 60 fps, é recomendável definir esta velocidade para pelo menos 1/60 de segundo ou mais rápida. Valores mais rápidos/curtos reduzem o desfoque de movimento, mas reduzem a luz capturada pela Facecam 4K.
- ISO: Conforme mencionado anteriormente, controla a sensibilidade do sensor da Facecam 4K. Aumente esta configuração para aumentar o brilho da imagem ou diminua-a para reduzir o ruído. É recomendável que este valor seja o mais baixo possível. Procure reduzir o ISO para menos de 1.000.
Processamento de redução de ruído
O processador de sinal de imagem da Facecam 4K possui algoritmos avançados de processamento e redução de ruído. Inclui redução de ruído 2D e 3D.
Esta opção tem algumas predefinições.
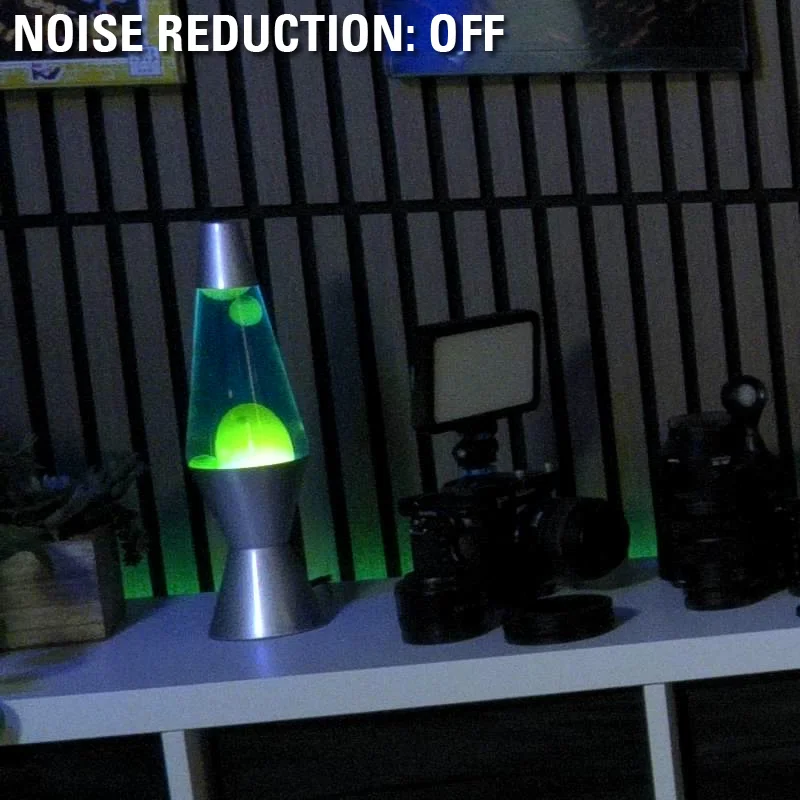
- Desligado: Esta é a imagem diretamente da câmara, sem redução avançada de ruído adicionada.
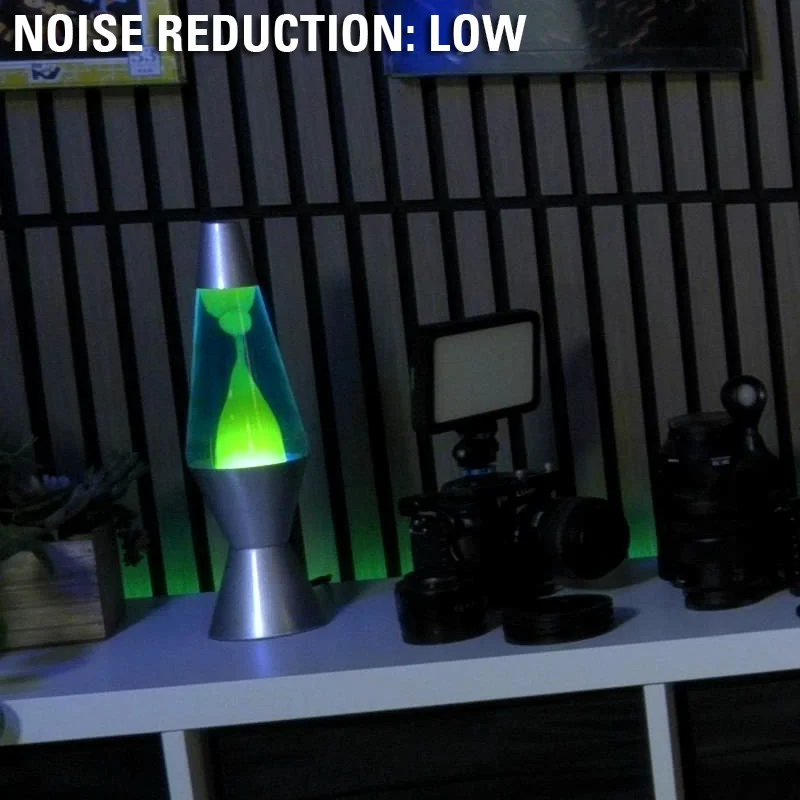
- Baixo (padrão): esta seleção funciona bem para a grande maioria dos casos. Reduz grande parte do ruído.
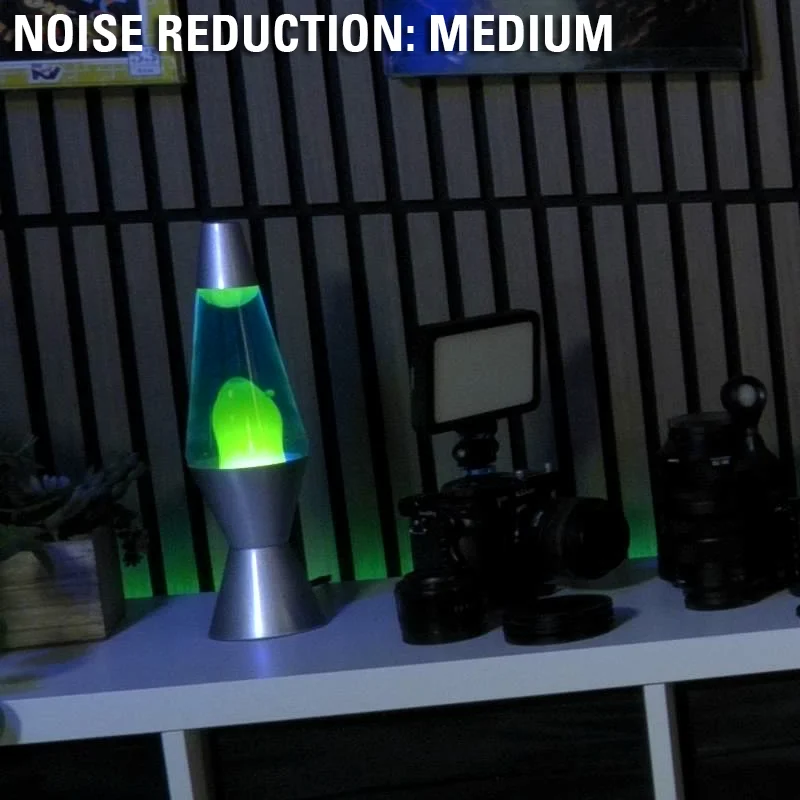
- Médio: Isso aumenta a força do algoritmo.
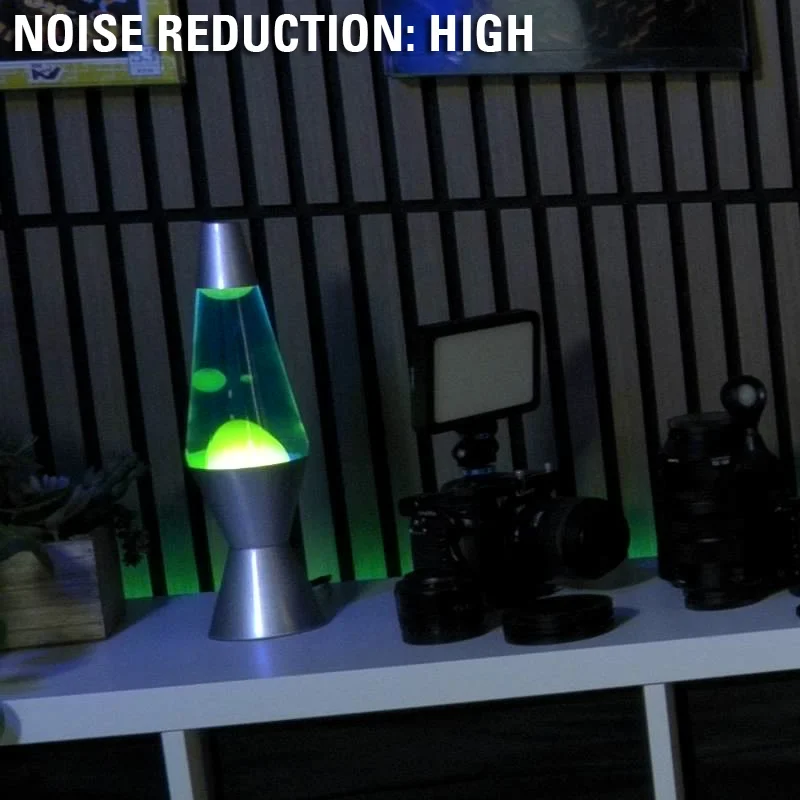
- Alta: Esta é a predefinição mais alta, com a redução de ruído 2D e 3D mais forte.
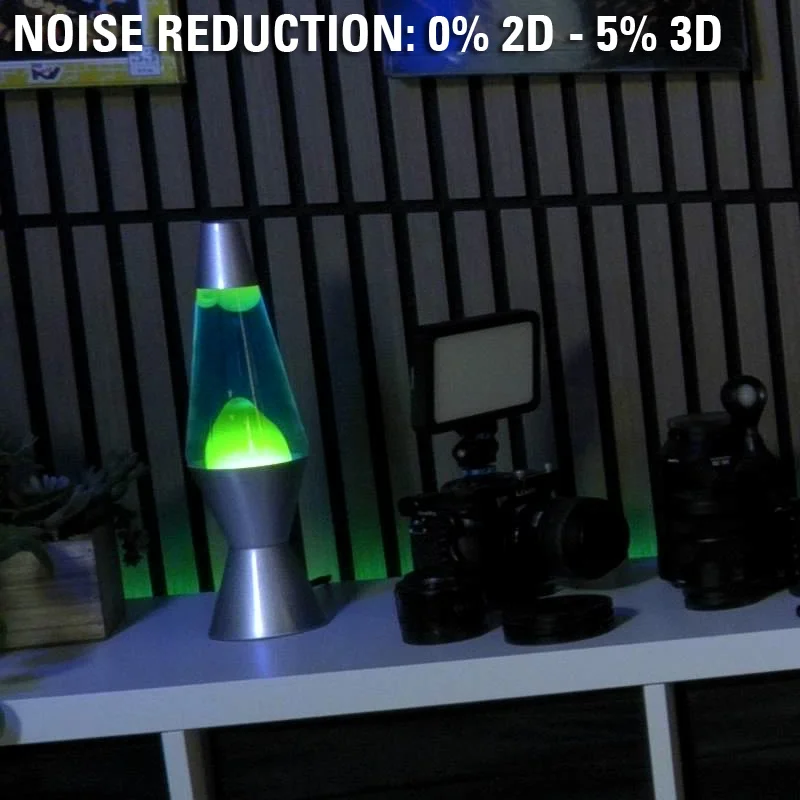
- Personalizado: com esta seleção, pode ajustar com precisão o nível de redução de ruído 2D e 3D desejado. Nestes exemplos, escolhemos uma redução de ruído 3D de 5%.
Dependendo do nível de luz, ISO, ruído e textura da sua cena, poderá não notar muita diferença além do nível baixo.
Ajustar o equilíbrio de brancos
O equilíbrio de brancos automático geralmente funciona bem, mas às vezes pode interpretar erroneamente os tons quentes do seu espaço.
Se o seu quarto tiver madeira quente, lâmpadas aconchegantes ou LEDs de destaque, talvez seja melhor bloquear o equilíbrio de brancos manual.
Além disso, bloquear o equilíbrio de brancos num valor específico impedirá que a Facecam 4K interprete a iluminação LED RGB animada como uma alteração no equilíbrio de brancos que precisa ser corrigida.


Equilíbrio de brancos automático
Equilíbrio de brancos personalizado - 5200K
Efeitos criativos: Desfoque de fundo com IA e LUTs
A qualidade da Facecam 4K vai além das configurações de hardware. Também é possível melhorar a imagem da Facecam 4K usando fundos de IA, como desfoque bokeh ou camadas em predefinições de Look Up Table (LUT).
- Os fundos AI podem ser usados para desfocar o fundo ou substituí-lo por uma imagem ou vídeo. Esse recurso usa e requer uma GPU Nvidia RTX, como uma RTX 2060 ou superior.
- As LUTs, ou tabelas de consulta, são semelhantes às predefinições de gradação de cores. Elas podem alterar o brilho, a tonalidade, a saturação e muito mais, tudo com um único ficheiro. Existem cinco incluídas no Camera Hub, mas pode encontrar mais no Elgato Marketplace ou criar as suas próprias.


Pode encontrar muitas outras LUTs da Elgato e dos criadores da comunidade no Marketplace.
Todos juntos agora
E com isso, personalizou e melhorou a aparência da Facecam 4K, desde a iluminação, cor e controlo de ruído até efeitos de vídeo com IA. Quer saber mais? Para obter mais dicas sobre câmaras, explore a nossa secção Câmaras no Explorer.
PRODUTOS NO ARTIGO