JUHEND | KIIRJUHEND
Elgato Wave Link 3.0 — Software Overview
Quick Start Guide for Wave Link 3.0
Wave Link is built for creators, not DJs. Route any input to 5 custom mixes, stack apps into channels, and apply pro VST/AU effects to everything. Works with any mic or interface. Control it all from Stream Deck. Studio-level mixing made simple, powerful, and free forever.
- Zero Learning Curve: Intuitive horizontal matrix replaces confusing vertical mixers.
- Limitless Routing: Send any input to any of 5 independent mixes.
- Stack & Streamline: Group multiple apps per channel for clean, focused mixing.
- Pro-Grade Effects: Apply VST3/AU plugins to any source, hardware or software.
- Multi-Device Unity: Connect up to 4 Wave devices plus unlimited third-party gear.
- Stream Deck Control: Adjust volume, mute, and switch mixes without breaking flow.
- Audio for Every Destination: Tailored mixes for stream, VOD, Discord, second PC, or anywhere.
- Universal Compatibility: Works with any mic, interface, or capture card your computer sees.
- Forever Free: No subscriptions, no trials, no ecosystem lock-in. Just download and create.
Wave Link 3.0 is free.
Wave Link 3.0 works with any microphone.
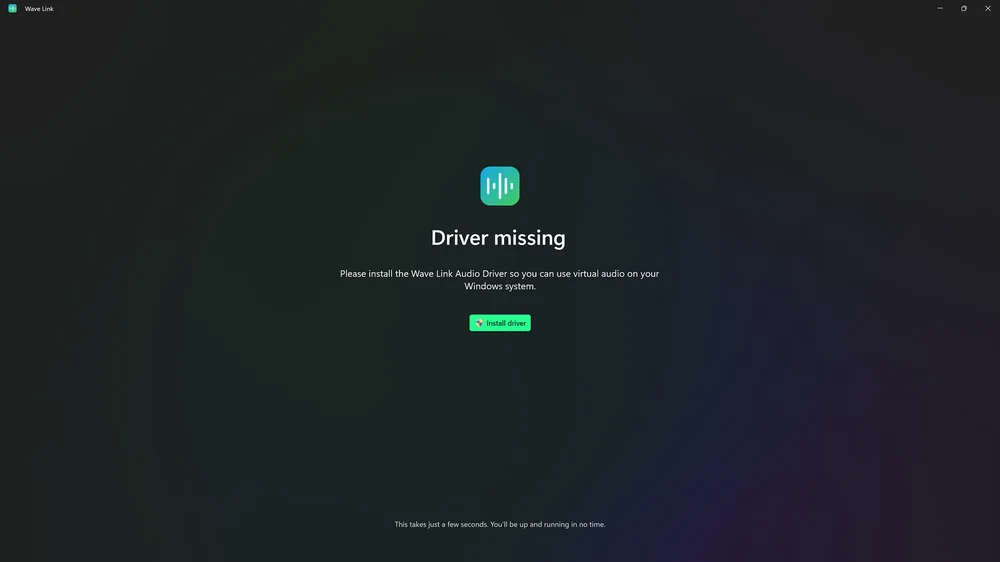
Wave Link Setup
To get started with Wave Link 3.0 in Windows, you will need to install the Wave Link Audio Driver.
You will need to grant Wave Link access to your microphone and system audio.
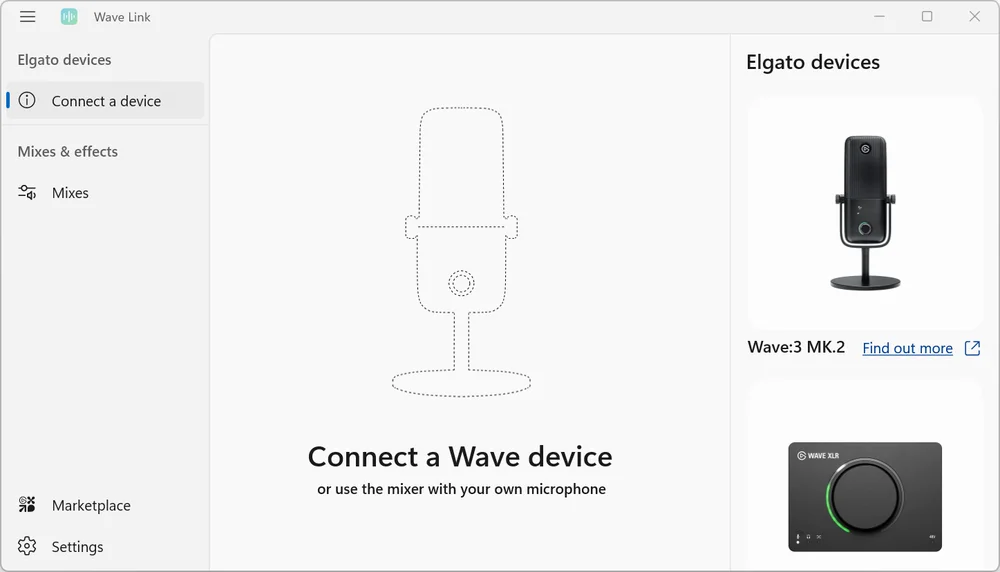
You are given the option to connect your Elgato Wave device, if you have one.
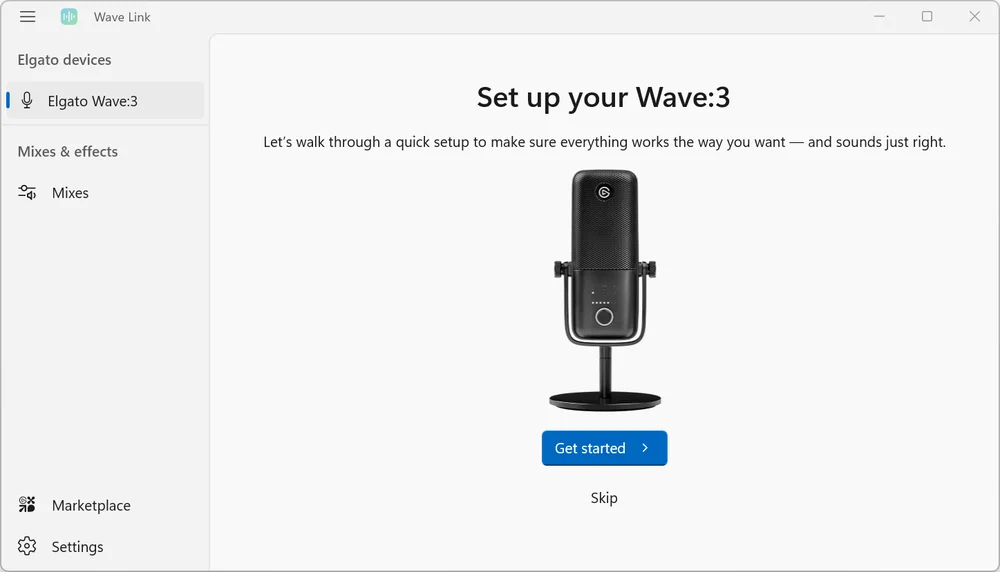
When you use Wave Link with an Elgato Wave device, you’ll see the configuration for your device.
This feature is only available for Elgato Wave devices thanks to tight integration between hardware and software. You’ll learn the controls for your Wave device, set the optimal gain, and ensure the monitoring is working.
Wave Microphone Setup
As an example, we will set up Wave:3 with Wave Link 3.0.
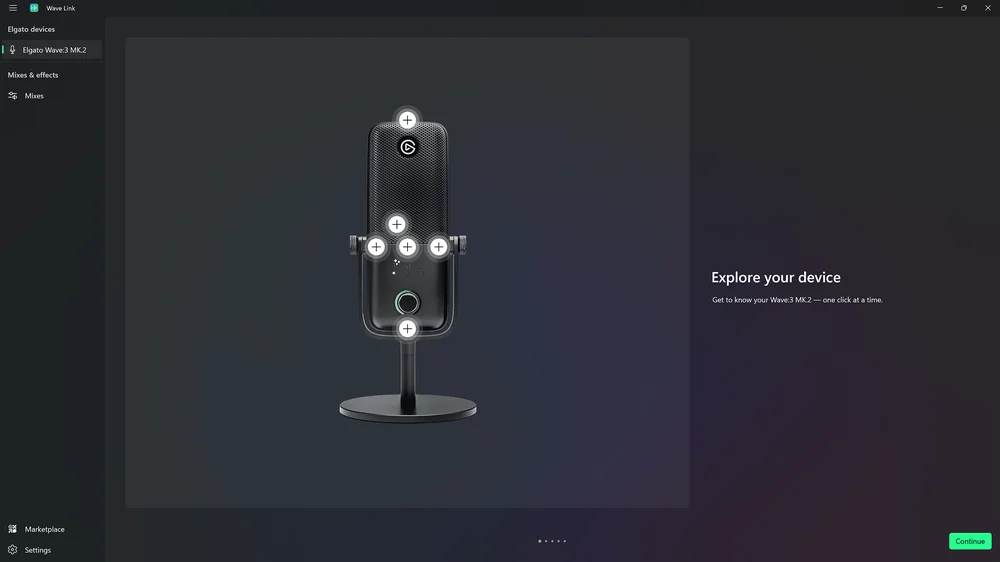
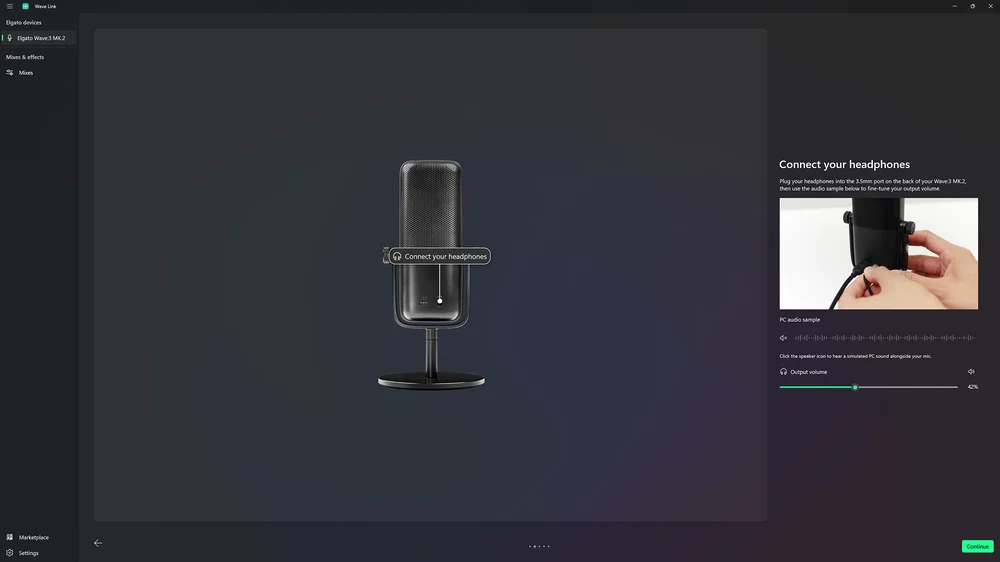
If you are using an Elgato microphone, you will be given a diagram of your microphone. You can click on the "+" signs to find out more about certain parts of your device.
Plug your headphones into the 3.5 mm port on the back of your Wave:3, then use the audio sample playback control to fine-tune your output volume.
There are ideal ways that you can position your mic. For the best sound:
- Speak into the front of your mic. For example, when using the Wave:3, make sure the Elgato logo is facing you.
- Keep the right distance. For example, when using the Wave:3, use your hand to measure the ideal distance, with your thumb at your mouth, and pinky finger pointing toward the mic.

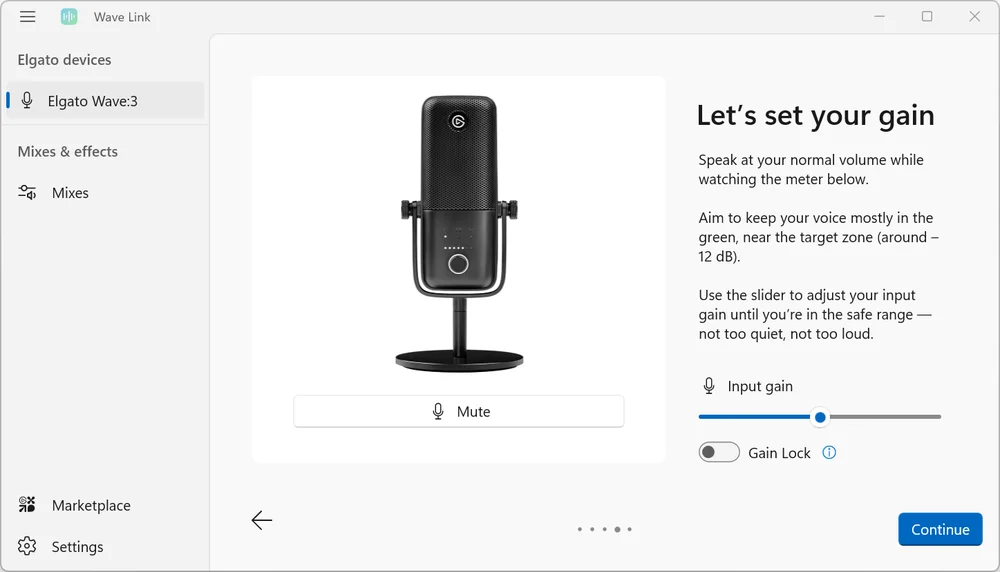
When setting your gain:
- Speak at your normal volume while watching the on-screen meter.
- Aim to keep your voice mostly in the green, near the target zone (around -12 dB).
- Use the slider to adjust your input gain until you're in the safe range — not too loud, not too quiet.
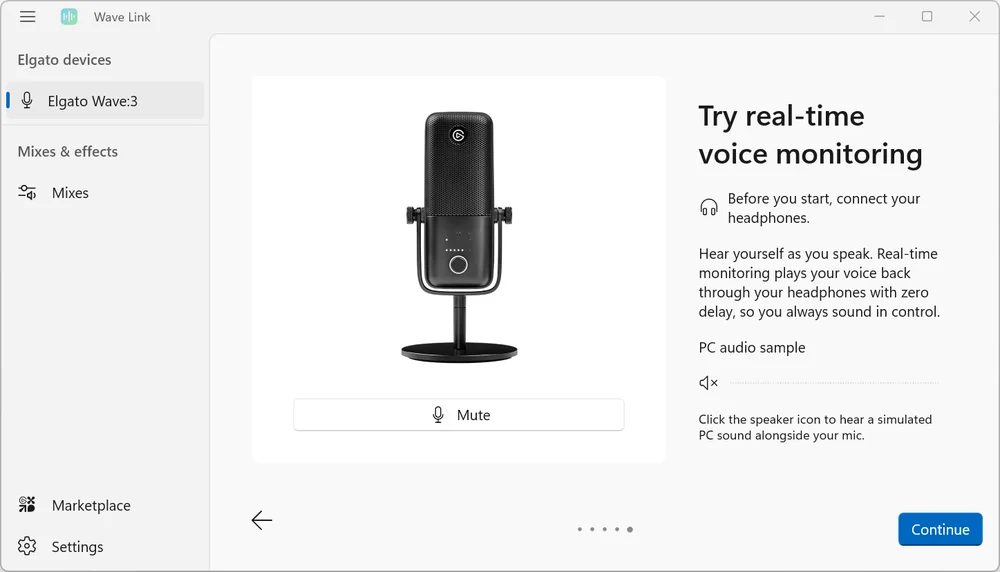
Real-time voice monitoring allows you to hear your voice as your speak. It plays your voice back through your headphones with zero delay, so you always sound in control.
To test Real-time voice monitoring:
- First connect your headphones.
- Click the on-screen speaker icon to hear a simulated PC sound alongside your mic.
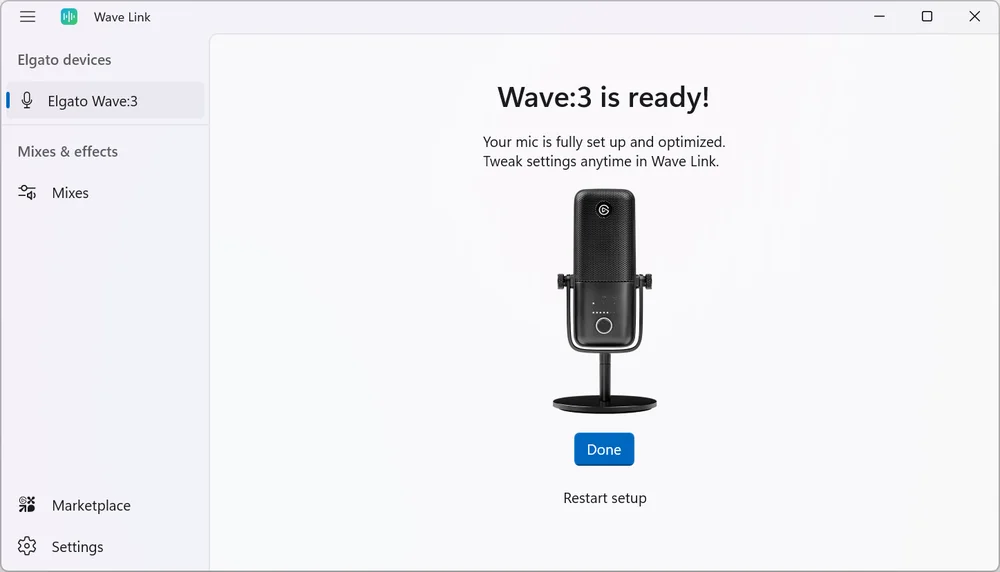
Your mic is fully setup and optimized. Tweak settings anytime in Wave Link.
Microphone Settings
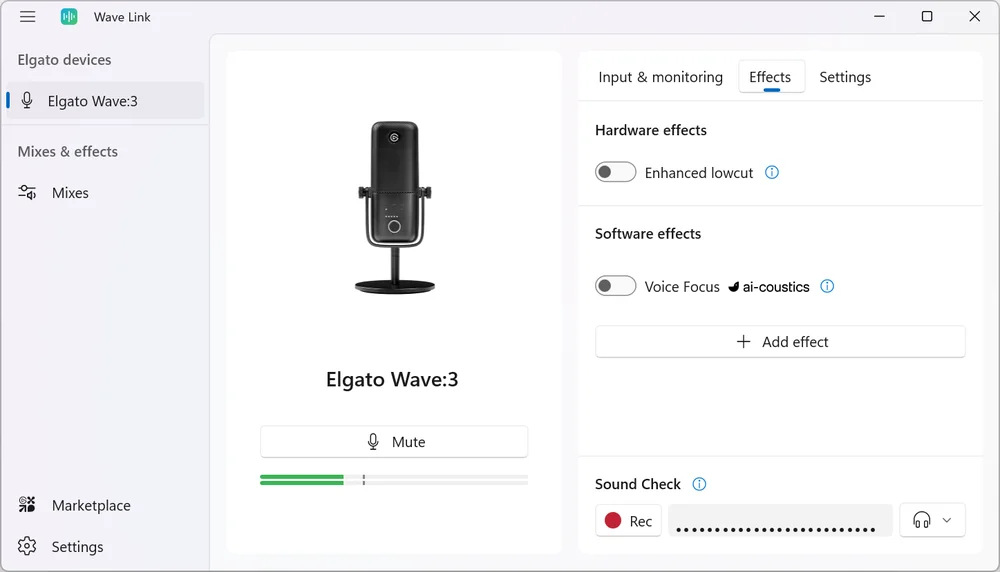
Each Elgato microphone will have slightly different settings when used with Wave Link 3.0. For example, here are the settings for Wave:3.
Input & Monitoring
Input
- Input Gain - A - and + slider to change gain in dB
- Gain lock - Prevents other apps from changing your mic gain
- Clipguard - Tames loud bursts like excited reactions to keep audio clean and distortion-free
Monitoring
- Output volume - A slider from 0% to 100%
- Mic/PC mix - A slider controlling how much of the audio is monitored on the Mic (left slide of the slider) or the PC (right slide of the slider)
Sound Check
- Record your voice to test effects and adjust your audio before going live

Effects
Hardware Effects
- Enhanced lowcut - Cuts low-end noise like typing and rumble. Turn off if you want a deeper vocal sound.
Software Effects
You can add audio effects after adding your mic to a mix.
Sound Check
- Record your voice to test effects and adjust your audio before going live
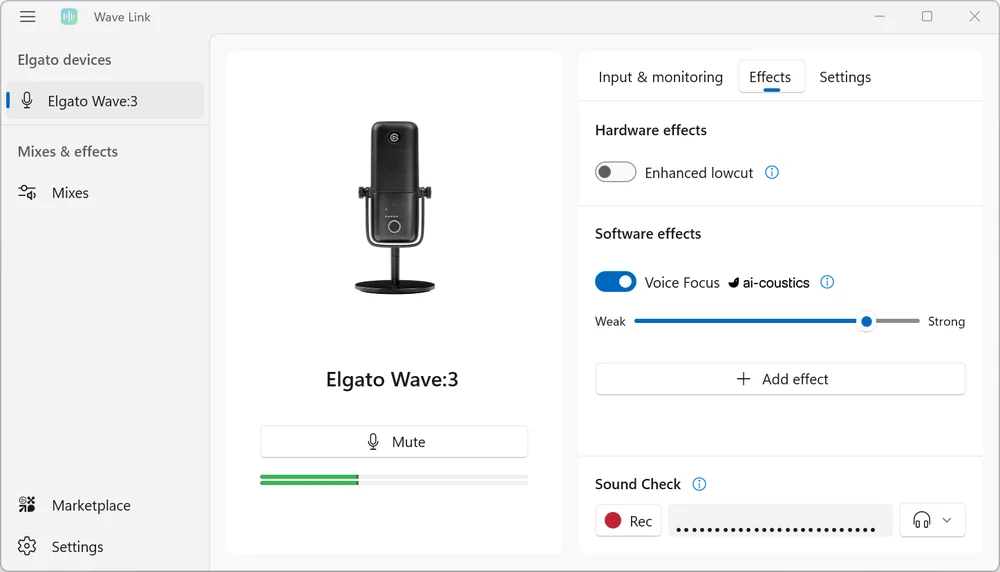
Voice Focus
- Certain microphones like Wave:3 have Voice Focus as an option.
- You can turn it on in the Software section of the Effects settings.
- Press the Go button to access that Voice Focus.
- Voice Focus cleans up your audio using AI-powered noise and echo reduction.
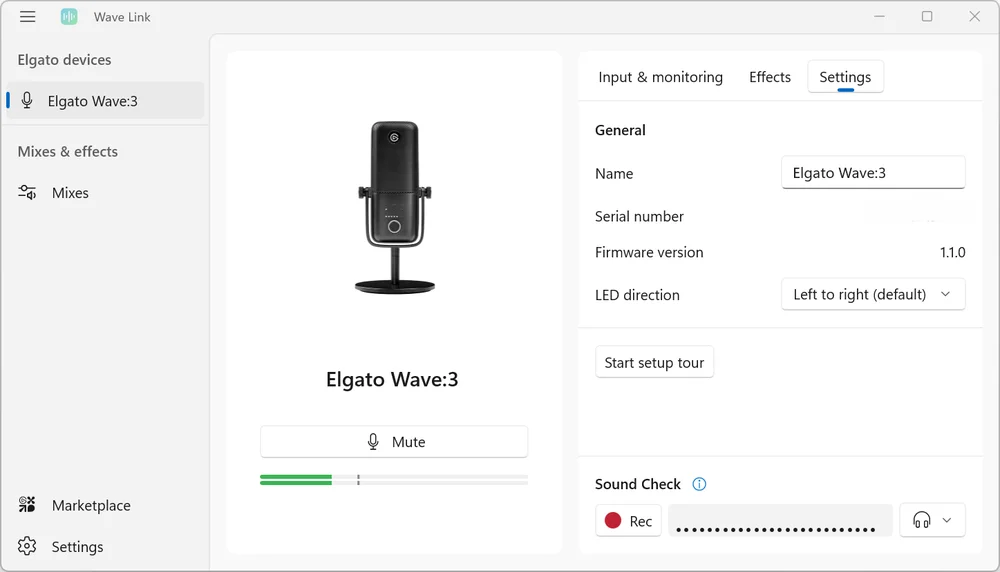
General
- Name - Product name by default, but you can change it
- Serial Number
- Firmware Version
- LED Direction - Left to right (default), Right to left (inverted mounting)
- Start Setup Tour - Press to re-do the Elgato Mic setup
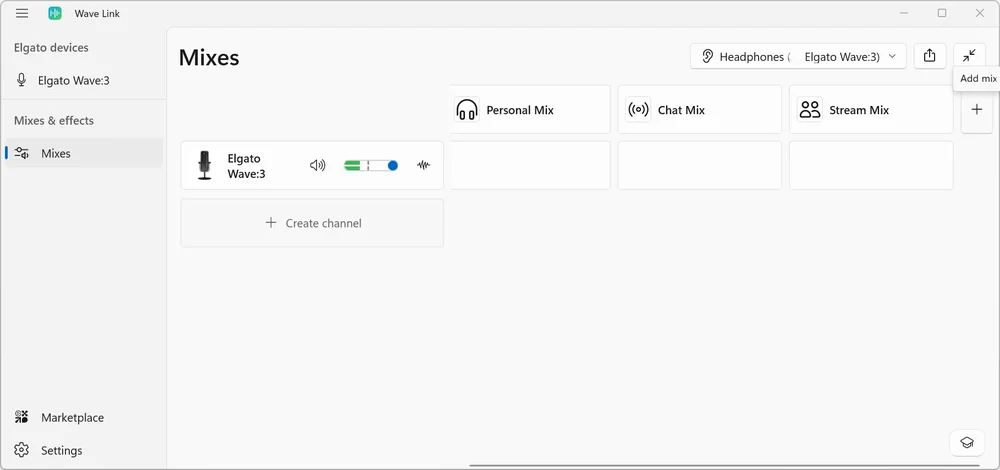
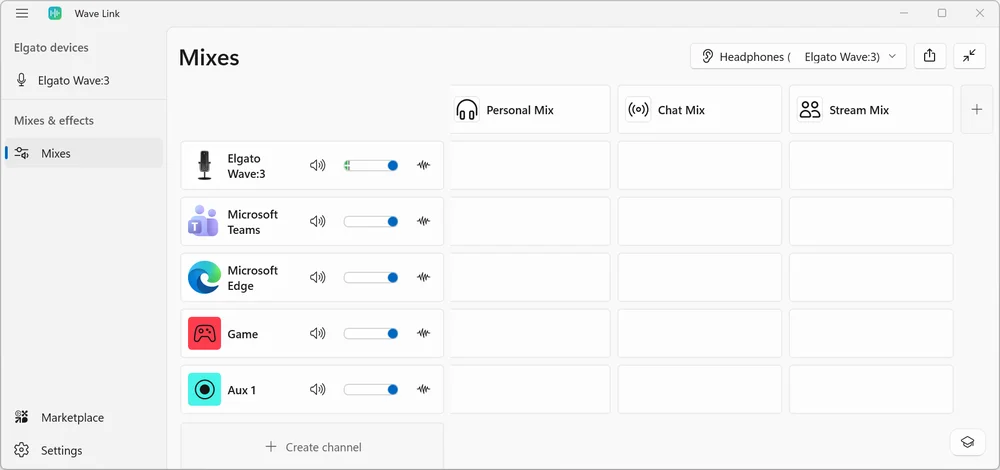
Mixes
This is the Wave Link Mixes view. Along the left, you’ll see Inputs. At the top are your Mixes. Above the Mixes, the monitor device selection is where you choose your main Output.
You will start out with just one Mix - whatever microphone is first attached and set up.
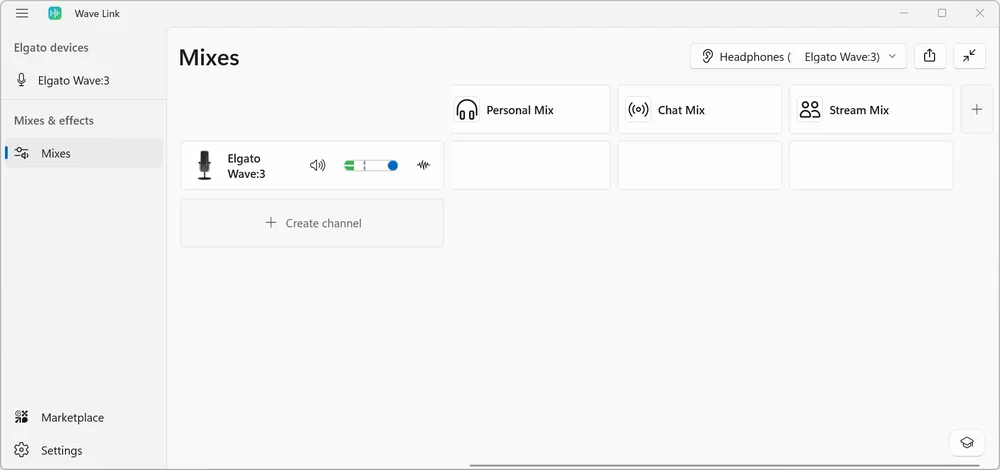
At the top of the Mix view you’ll see the output Mixes. Each Mix can contain its own inputs.
To add a new Mix, simply click the "+" button on the right side.
By default, you can add Personal, Chat and Stream Mixes.
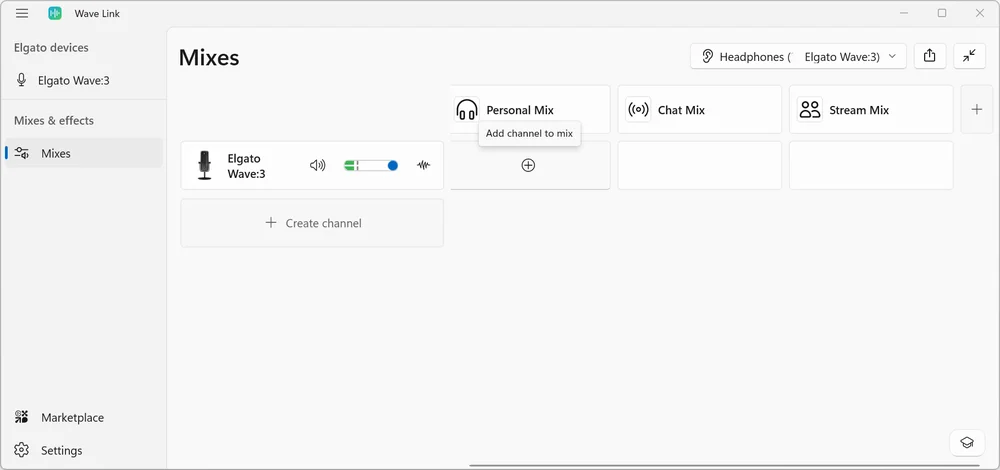
To add a Channel to a Mix, click the "+" button below a Mix.
Each Mix will show separate volume levels.
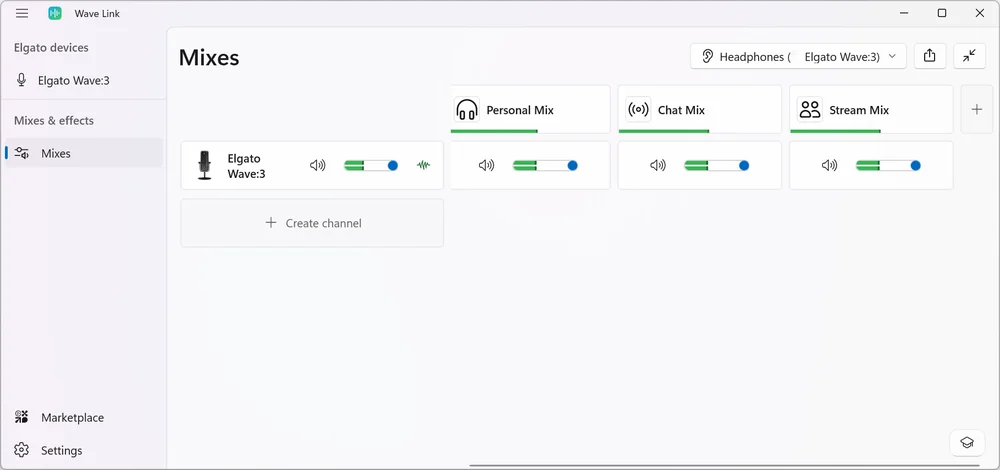
You can configure up to 5 Mixes.
Mixes can be configured in a variety of ways - each Mix can be renamed and a custom icon can be applied to it.
You add monitor outputs to the Mix. Each Mix can be played out through any number of physical (Or virtual) output devices like headphones, speakers, and more.
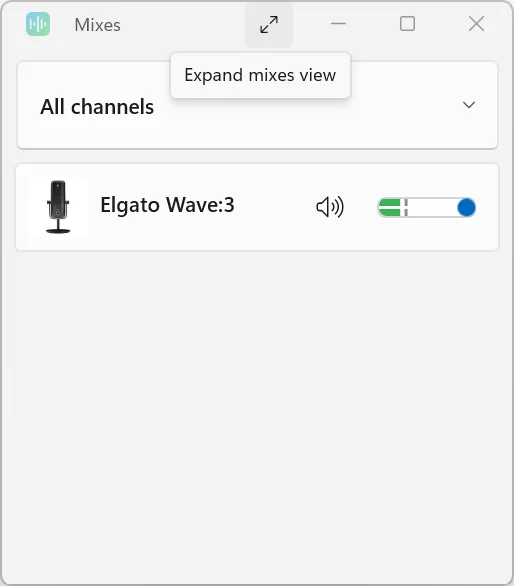
To shrink the Mixes view, you can press a button at the top right corner of the window - it has an icon showing two vertical arrows.
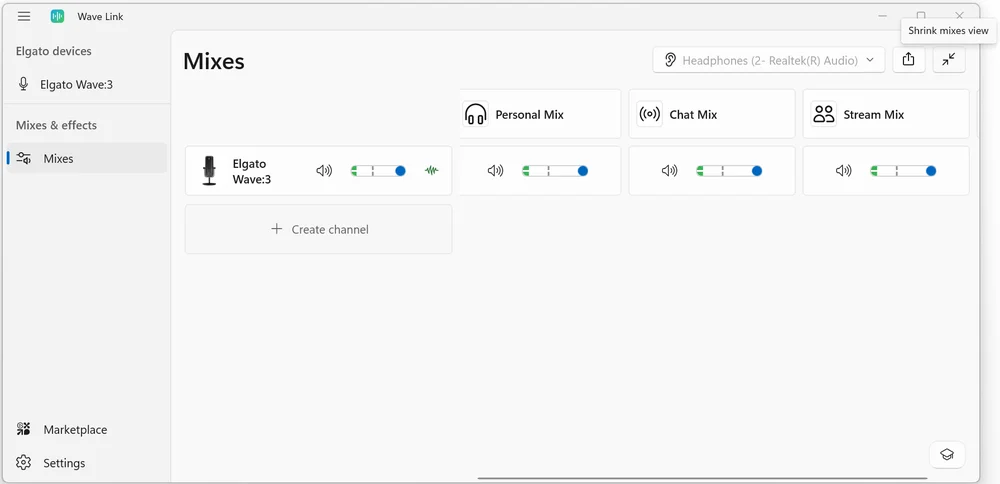
While the Mixes view is shrunk, you can still choose a specific channel.
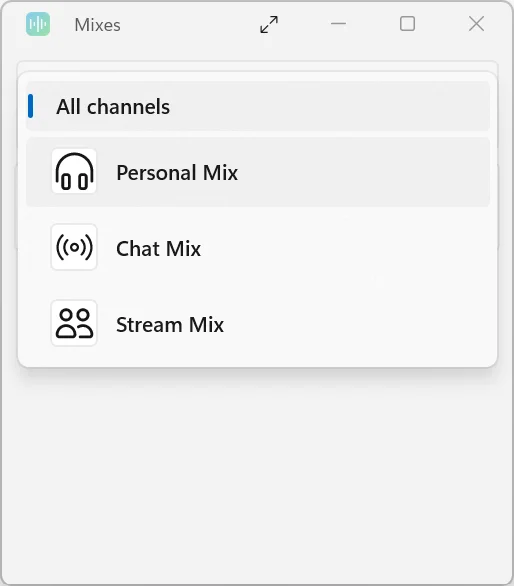
To expand the Mixes view, press a similar button at the top of that window.
Inputs
Inputs are found on the left side of the mix view.
When creating a Channel, you’ll see a list of all available Input devices first, followed by apps.
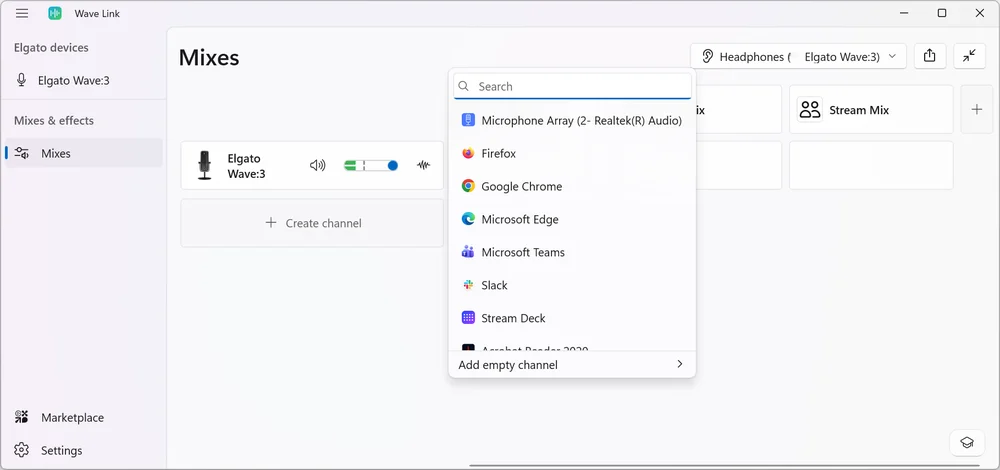
Inputs include apps, games, microphones, capture cards, and any other audio inputs you can think of.
Nearly any type of Input, as long as it can provide stereo sound is supported. This includes non-Elgato microphones and interfaces, such as Blue Yeti, HyperX Quadcast, Razer Seiren, etc.
You can also add a Virtual Channel. These work as they did in Wave Link 2.0. The Virtual Channel appears in games or apps, and you can output sound to that Channel.
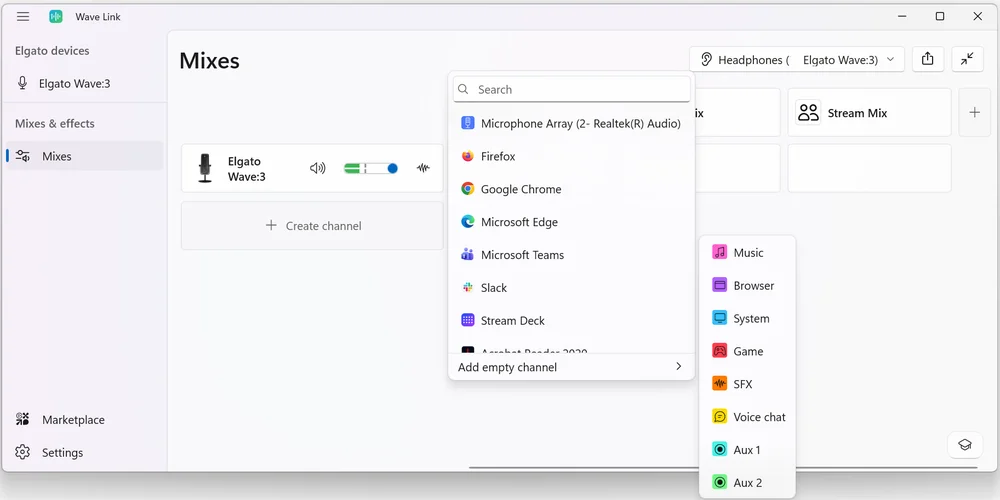
You can organize your Channels in a way that works best for you.
Audio Effects
Each Input can have Audio Effects added to it. For example, you might add a compressor to a mic, an EQ with a slight bass boost to Music, or a voice changer to Discord so your friends sound like chipmunks.
To add an Effect, click on the effect button.
Then choose your Effects from the list.
Once added you can configure the Effect.
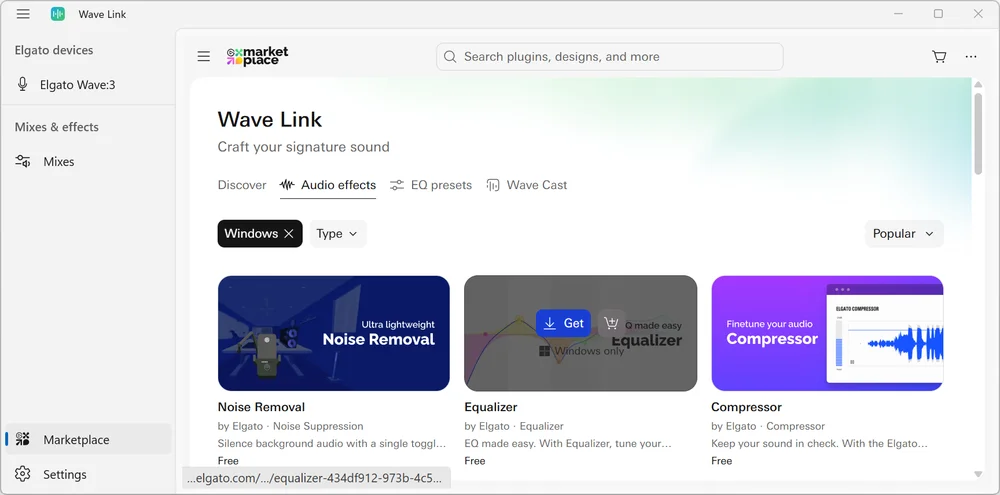
Elgato Marketplace
Elgato Marketplace is directly integrated into Wave Link for Windows users. For macOS users, the Marketplace link will bring you to Marketplace in your default browser.
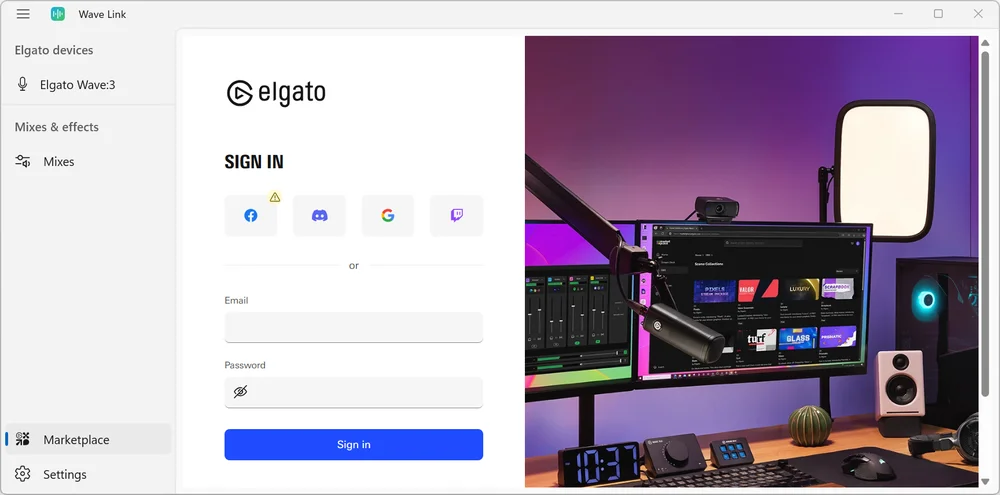
Once signed in, you can browse and install new Audio Effect plugins. The VST3 format is used for Windows, and the Audio Unit (AU) format is used for macOS.
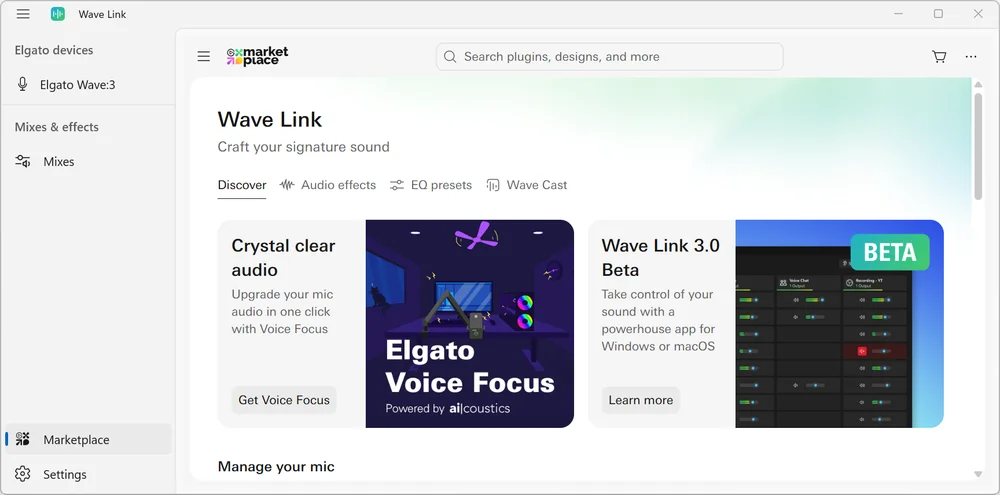
If Marketplace appears too large or too small in the Wave Link window, you can change the size by using the scroll wheel on your mouse while holding the "CTRL" key. This is the same as any other website.
Go to the Audio Effects section to search for Effects.
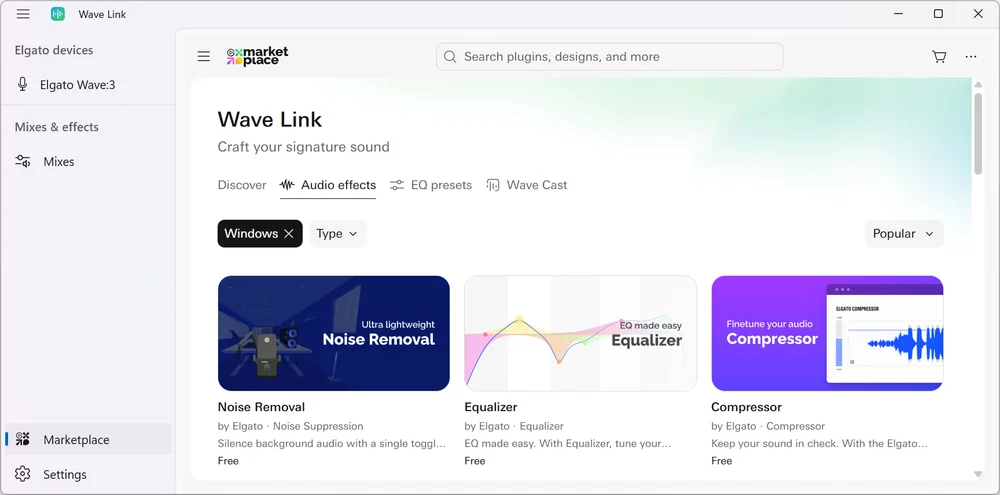
To acquire an item, hover over your choice and:
- Press the blue "Get" button for the immediate download of free items
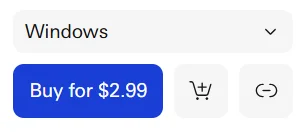
- Press the blue "Buy now" button to purchase items with a price
- Press the Cart icon to place the item into your shopping cart for later purchase.
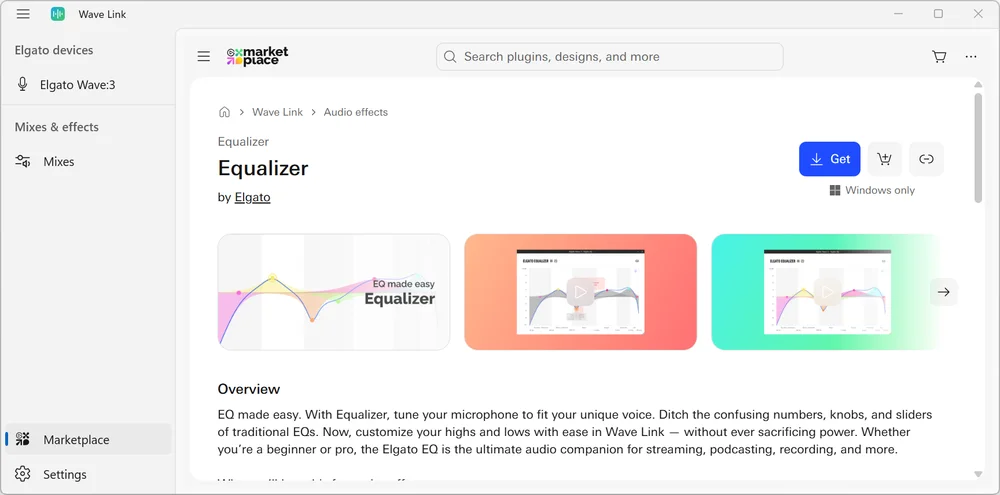
You can click on the graphic for that Audio Effect to find out more about it.
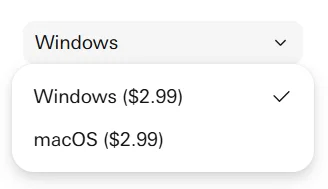
When acquiring an Audio Effect, make sure to download the correct one for your operating system.
There will be a drop down menu to select Windows or macOS.
How Wave Link Enables Workflows
Streamer
Power Your Stream with Precision Control
Route your mic, game audio, Discord, and music to separate mixes—one for your stream with perfect balance, another for your headphones so you hear exactly what you need. Apply voice effects that make you sound pro, adjust levels on the fly, and group chat apps together for instant control. Wave Link keeps your audience hearing your best while you stay focused on the game.
Podcaster
Professional Sound, Zero Complexity
Create dedicated mixes for your recording, your co-host's monitoring, and your own headphones—all independently controlled. Route guest audio from Zoom or Riverside, apply compression and EQ to your mic, and group all your music sources into one channel. Whether you're solo or multi-tracking, Wave Link gives you broadcast-level routing without the broadcast-level learning curve.
Remote Worker
Meeting Audio That Actually Works
Route your mic to Teams with noise suppression and voice enhancement, while keeping Slack notifications and email alerts in a separate channel you can mute during presentations. Create a monitoring mix that lets you hear yourself clearly without distractions. Group all your communication apps for quick level adjustments. Wave Link turns chaotic work-from-home audio into a controlled, professional setup.
Gamer
Gaming Audio Without the Headaches
Keep your game loud, Discord clear, and music in the background—exactly how you want it. Route everything to your headphones in one perfectly balanced mix, then tweak levels without alt-tabbing. Mute Discord during clutch moments, mute music when callouts matter, or quickly trigger soundboard clips through Stream Deck to mess with your squad. Wave Link makes managing your gaming audio as easy as playing the game itself—no streaming setup required.
Redesigned Stream Deck Plugin
With years of experience, our team rethought the Wave Link plugin entirely, and the new Wave Link plugin features beautiful new designs and tight integration. It feels like a seamless extension of Wave Link for perfect control. Adjust volume, toggle channels in mix, turn on effects at just the right moment.
Get the Wave Link 3.0 for Stream Deck from Elgato Marketplace here.
Settings
To adjust the Settings of Wave Link 3.0, select the button at the bottom left corner of the main Wave Link window.
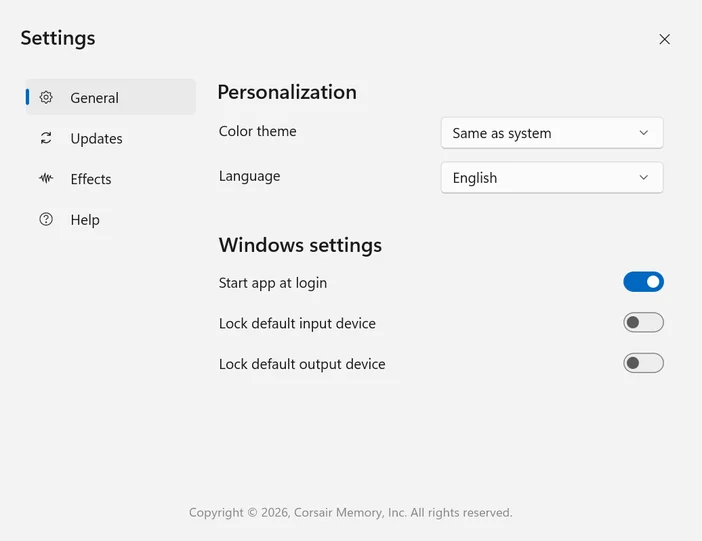
Here are the General Settings:
1) Personalization
- Color Theme - Same as System, Dark, or Light
- Language - English
2) Window Settings
- Start app at login - On, Off
- Lock default input device - On, Off
- Lock default output device - On, Off
Here are the Updates Settings:
1) Check for updates
- Pressing this button will automatically search for the latest software update.
2) Automatically install updates
- You can turn this option On or Off
3) Release channel
- Stable, or Beta.
- Beta versions can be unstable.
- If no update is available, changes won't take effect until the next release.

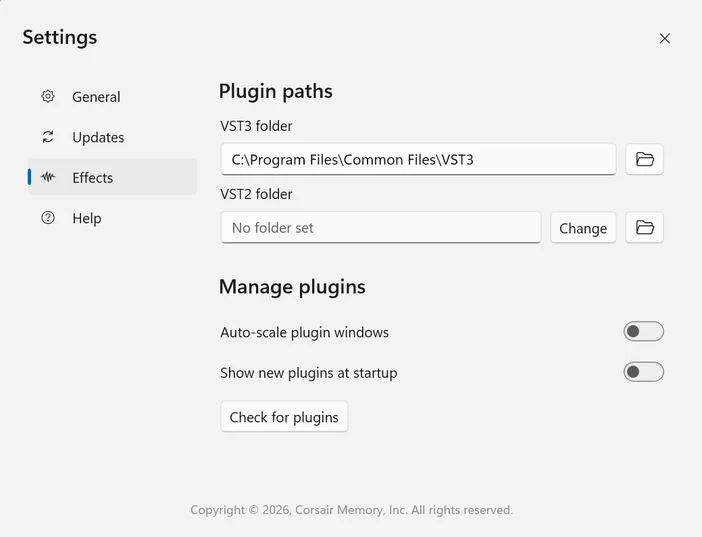
Here are the Effects Settings:
1) Plugin Paths
- VST3 Folder - By Default, C:\Program Files\Common Files\VST3
- VST2 Folder - There is no Default location; optionally set it to a folder of your choosing
2) Manage Plugins
- Auto-scale plugin windows - On, Off
- Show new plugins at startup - On, Off
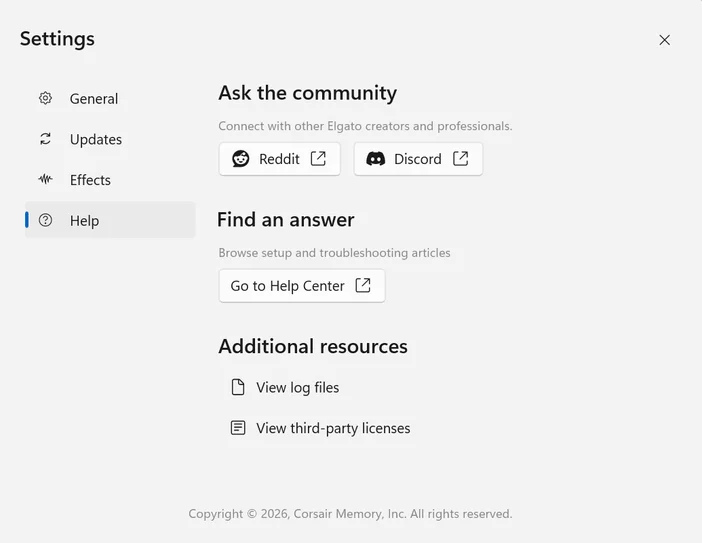
Here are the Help Settings:
1) Ask the community
- Reddit - A link to the r/elgato subreddit
- Discord - A link to the Discord invite page for Elgato
2) Find an answer
- Go to help center - Access Elgato Knowledgebase and Chat Help
3) Additional resources
- View log files
- View third-party licenses
Technical Specifications
Inputs (Hardware and software)
- Software or non-Wave audio input channels: Up to 8
- Wave Device inputs: Up to 4
- App/Software inputs per channel: Unlimited
Hardware Audio inputs:
- Elgato Wave devices
- 3rd-party audio inputs (Microphones, audio interfaces, etc)
- Capture cards
Mixes
Virtual Mixes: Up to 5
Mix outputs (Monitoring or playback): Unlimited devices
Audio engine
Sample rate: 48KHz
Bit depth: 24
Channel layout: Stereo
- Mono inputs are converted to stereo
Audio effects
- Windows: VST3
- macOS: Audio Unit (AU)
Maximum audio effects per input: Unlimited
- Effects may add additional latency
ASIO: Not supported
System Requirements
Windows
- Windows 11 (x64 or ARM)
- 8GB Ram (Recommended: 16GB+)
- CPU: Intel Core 10th Gen, AMD Ryzen 4000 series or higher recommended
macOS
- macOS 15.0 or newer
- 8GB Ram (Recommended: 16GB+)
- Intel or Apple Silicon (Recommended: Apple M1 CPU or better)