MANUAL | QUICK START GUIDE
Elgato Studio — Software Overview
Elgato Studio is our capture app for Windows and macOS, built from the ground up for creators who want less clutter and more control. Preview, device settings, and recording all live in one clean interface.
This guide covers the software interface of Elgato Studio.
Software Setup
1) Visit the Elgato Downloads page to get the latest version of Elgato Studio. It is available for Windows and macOS.
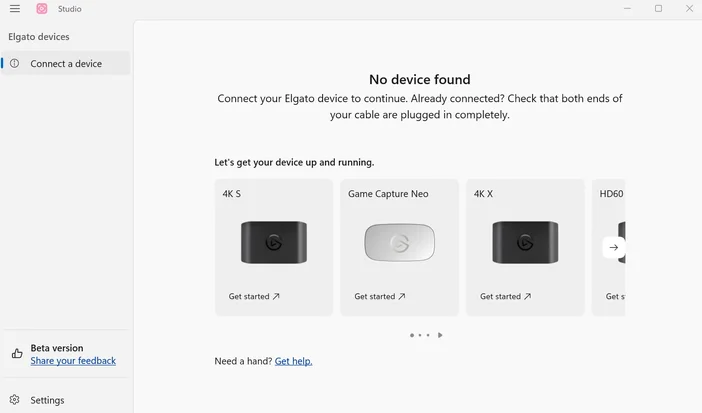
2) Install the software and launch it. You will then be asked to connect a compatible Elgato capture card.
3) Elgato Studio will then ask for Microphone and Camera permissions. This is to record and monitor audio from your capture device, and to capture and preview video.
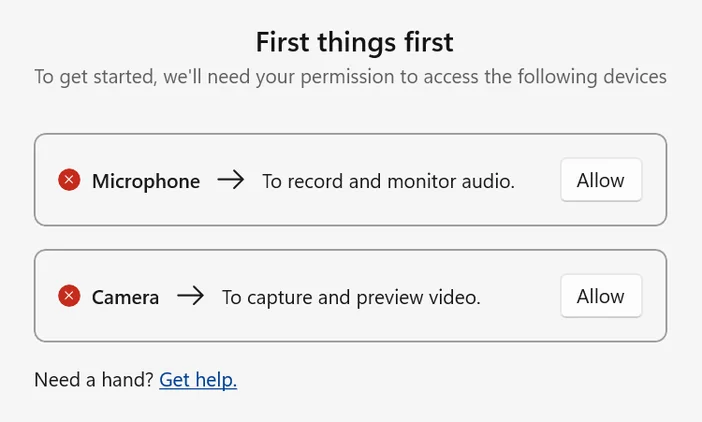
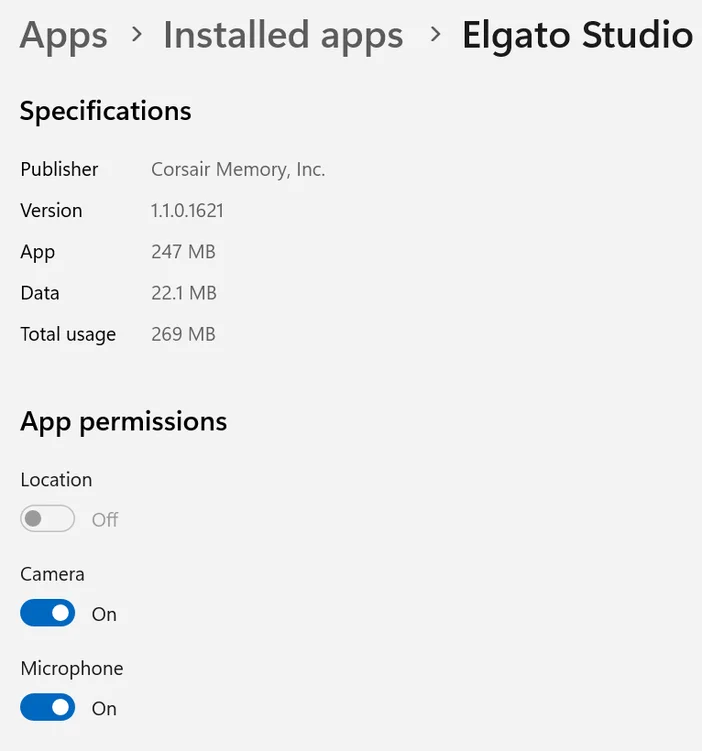
4) In Windows, Elgato Studio will open a window where you can turn on App Permissions for the Camera and Microphone.
Note: To control Elgato Studio via Stream Deck, please download the Elgato Studio plugin from Marketplace.
General Interface
Elgato Studio has a simple yet powerful interface. All of the controls you need are either on the top or bottom of the window.
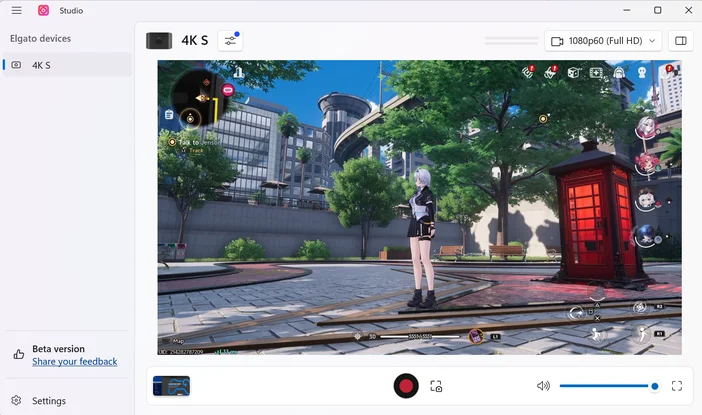
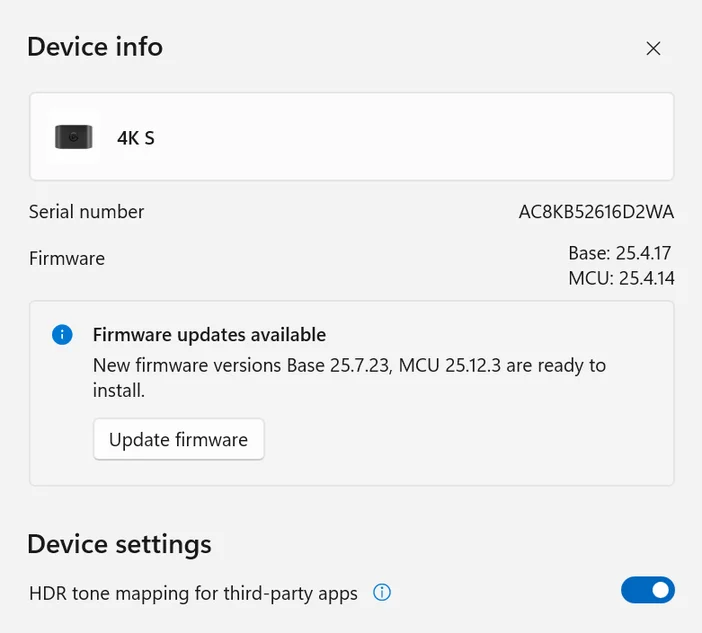
1) The top left hand side of the window has a drop down menu. It lets you select your device, and open the Device info window.
The Device info window lists the device's serial number and firmware version. It also offers special Device Settings, such as for HDR tone mapping for third-party apps (if supported by that device).
When HDR tone mapping for third-party apps is enabled, your capture device applies HDR-to-SDR tone mapping after Elgato Studio closes. This only effects 3rd-party apps that access the device directly, like OBS.
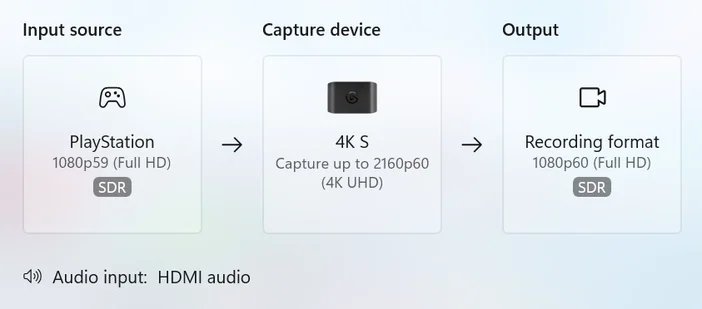
2) Next, there is a readout of the resolution and frame rate. Click on that for more information.
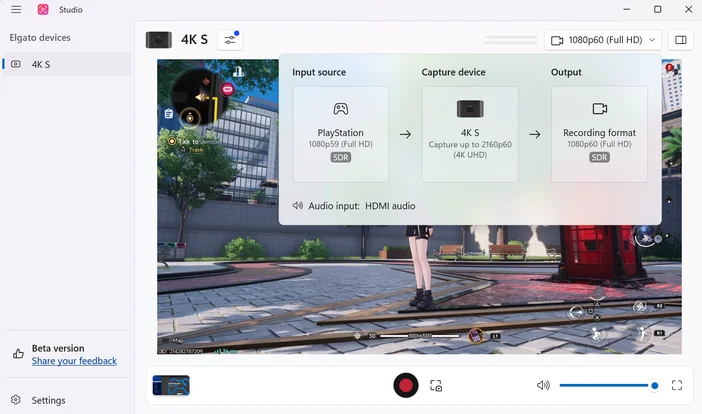
3) Specifically, Elgato Studio will list your Input source, Capture device, Output, Audio input, and HDMI Out.
4) On the top right corner of the window are two controls. The first lets you Show/hide device settings.
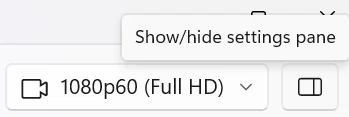
5) The Device settings will appear on the right side of the window.
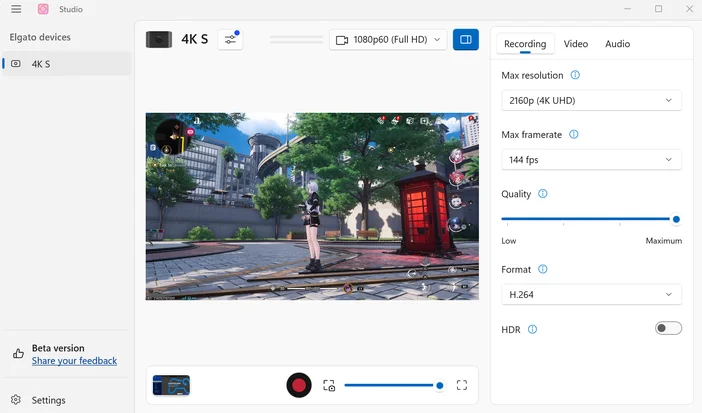
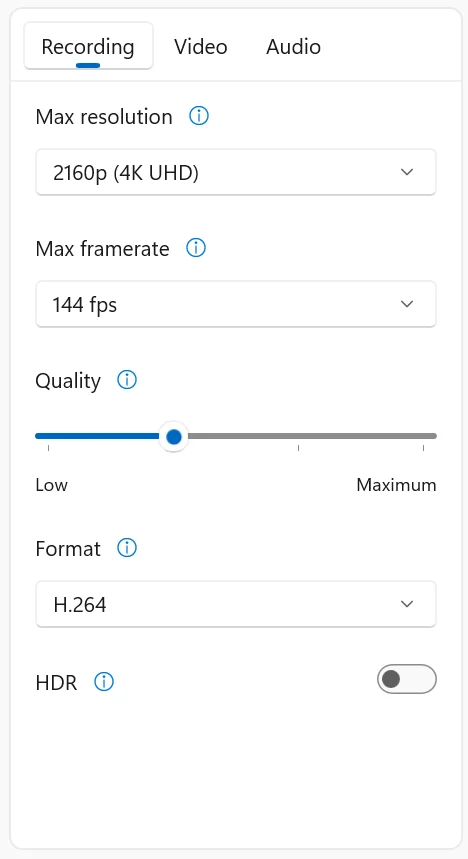
6) The Device settings has specific controls, including:
Recording
- Max resolution - Sets the upper limit for the resolution in your recording. Depends on the device. The actual resolution depends on your input signal and capture device. For example, the 4K X has 2160P (4K UHD), 1440p (QHD), 1080p (Full HD), 720p (HD). Higher resolutions preserve more detail but increase file size and system load.
- Max framerate - Sets the upper limit for frames per second in your recording. The actual framerate depends on your input signal and capture device. For example, the 4K X has 144 fps, 120 fps, 60 fps, and 30 fps. Higher framerates reproduce motion more accurately, but increase file size and system load.
- Quality - Controls how much detail is preserved in your recording. Higher quality means larger files. Lower quality reduces file size, which is useful when storage or upload speed is limited.
- Format - H.264 is compatible with most editing software and playback devices. HEVC and AV1 produce smaller files at similar quality, but require a support GPU and codec to be installed. HDR recording requires HEVC or AV1.
- HDR - On or Off. Records in 10-bit HDR to preserve the full color range and contrast of your source. Requires HEVC or AV1 format, and may reduce the maximum recording resolution on some devices. HDR preview requires a HDR-capable monitor. On a standard display, the preview is automatically tone mapped to SDR.
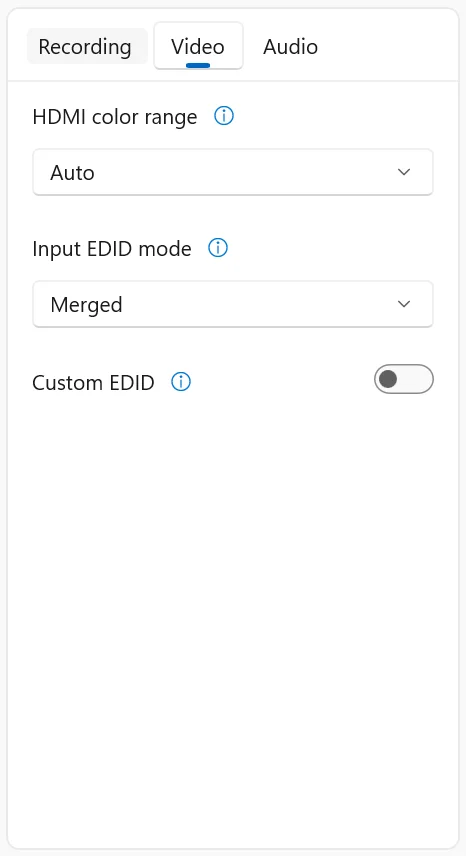
Video
- HDMI color range - Auto (recommended): Matches the settings of your input source. Expand: Converts a limited range (16-235) to a full range (0-255). Shrink: Converts a full range (0-255) to a limited range (16-235).
- Input EDID mode - Merged (recommended): Automatically selects the best settings for both your capture device and display. Display: Use your TV or monitor's settings, ignoring your capture device. Internal: Use your capture device's settings, ignoring your TV or monitor.
- Custom EDID - Choose a custom EDID for your setup by selecting a preset, or uploading a .bin file.
Audio
- Audio input - HDMI: Capture audio directly from your input source, such as a console. Analog: Capture audio from your capture device's 3.5-mm jack, ideal for accessories like Chat Link Pro.

Audio and Full Screen
Audio
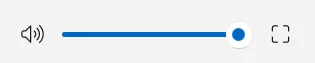
- To adjust the Volume, move the blue slider at the bottom right corner of the window.

Full Screen
- To move in and out of Full Screen, press the square icon to the right slide of the Volume slider.
Recording
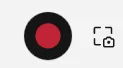
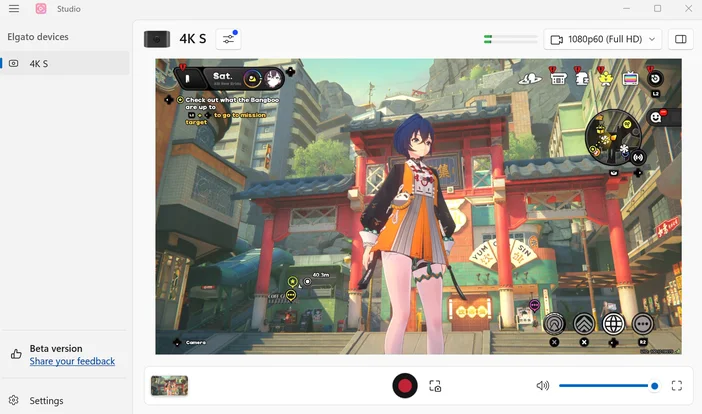
1) To Record, press the red circle at bottom of the screen.
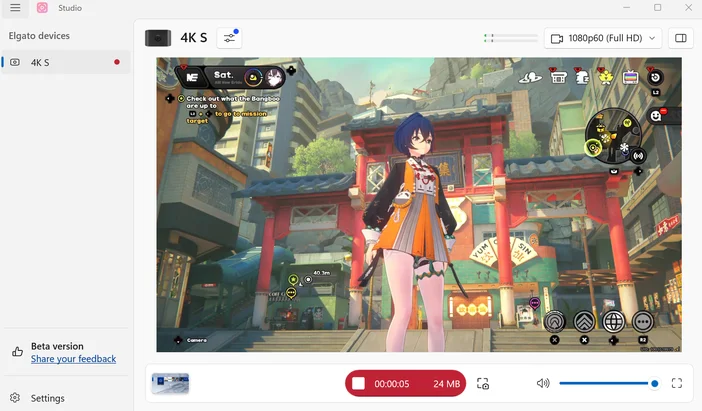
2) The circle will expand while recording. The time of the recording will be listed in seconds, and the size of the file appears on the right side.

3) Click on the recording button again to stop the recording
Screenshots
1) To take a Screenshot, press the square to the right hand side of the recording button.
2) A thumbnail of the screenshot will appear at the bottom right corner of the window.
3) Click on the bottom left hand side of the window - you will either see a folder icon or screenshot thumbnail there, depending on your last action. This will open the folder where your recordings and screenshots are saved. You can change the location of this folder in the Recording Preferences, discussed below.
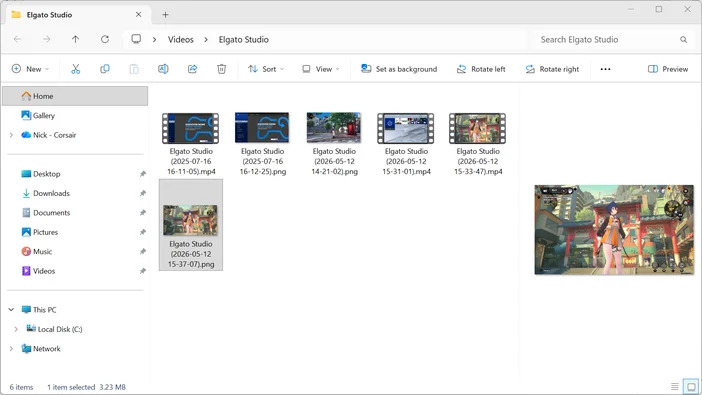
Note: Elgato Studio does not have a built in video editor. You can import your .mp4 recordings from this folder, into your editor of choice that supports the resolution and frame rate that you are using.
Settings
To open the Settings, use the Gear icon at the bottom left corner of the window.
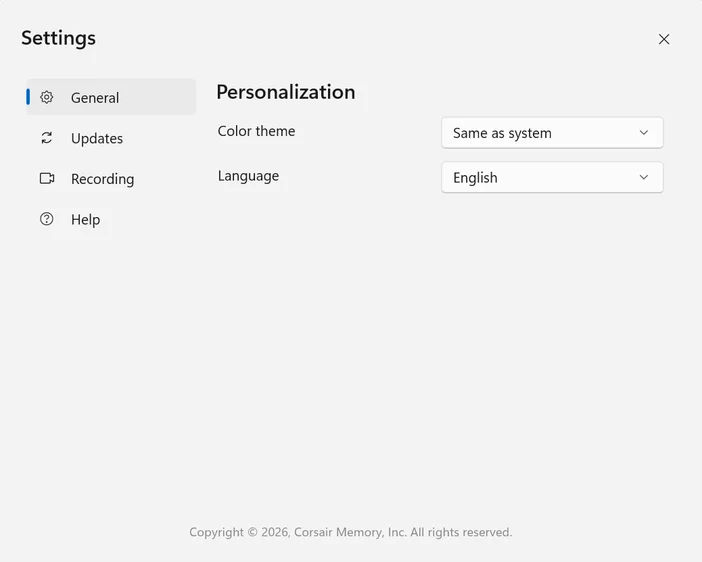
General
- Color theme - Choose from Same as system, Dark, and Light.
- Language - English, Danish, German, Spanish, French, Italian, Japanese, Korean, Dutch
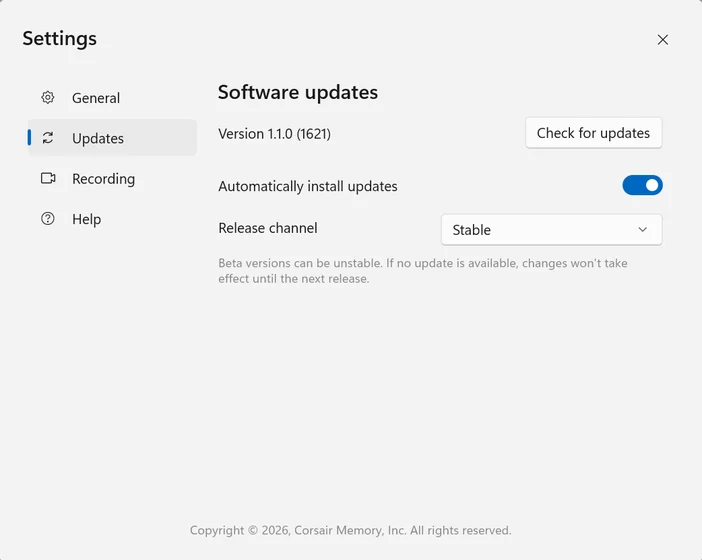
Updates
- Version - The version number is listed here for your reference. You can copy and paste this number to share it easily.
- Check for updates -You can Check for updates, and if there is a newer version, it will automatically be downloaded.
- Automatically install updates - Can be turned on or off
- Release channel - Stable is for release versions, and Beta is for test versions.
Recording
- Max Resolution - The max resolution for your device and source is listed. The actual resolution depends on your output settings and capture capabilities.
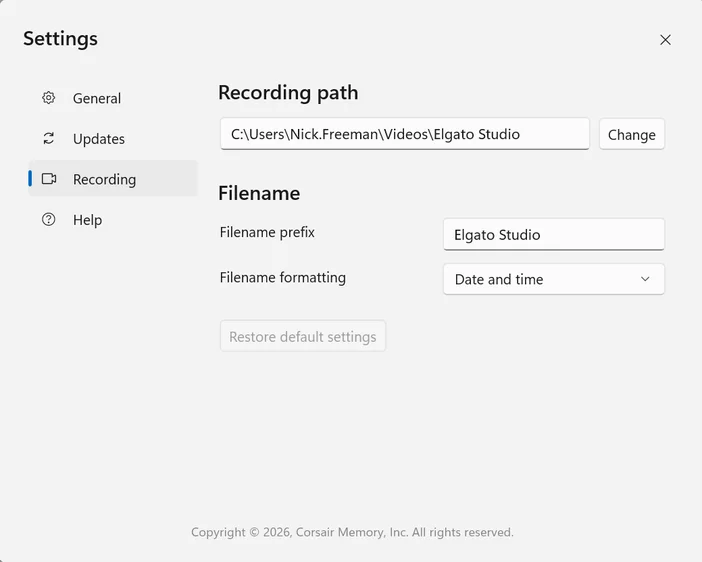
- Recording Path - Where your recordings and screenshots are stored. This path can be changed.
- Filename prefix - By default, the Filename prefix is "Elgato Studio", but this can be changed.
- Filename formatting - Date and time, or Incrementing number.
- Restore default settings - Will change all Recording settings back to their defaults.
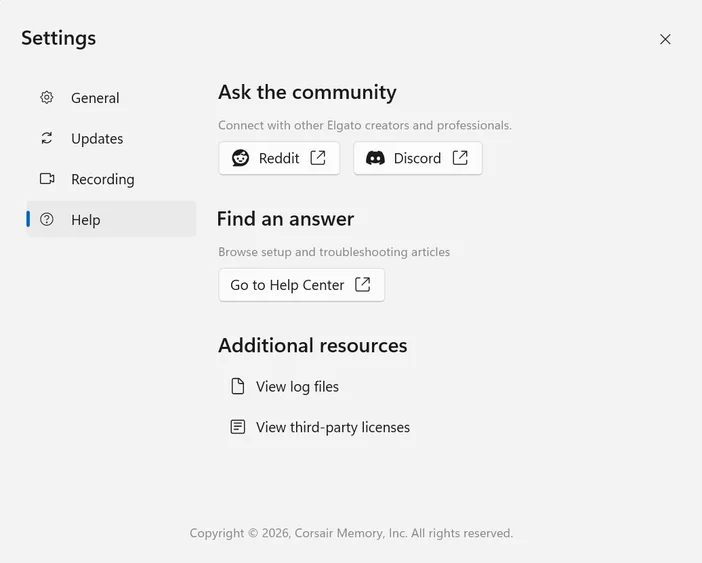
Help
- Ask the community - Connect with other Elgato creators and professionals via Reddit or Discord
- Find an answer - Browse setup and troubleshooting articles at the Elgato Help Center.
- Additional resources - View log files, or View third-party licenses.
Troubleshooting
USB 2.0 detected
If Elgato Studio detects a USB 2.0 connection, it will remind you to connect your device to an USB 3.0 port for the best performance. You can dismiss this warning by pressing the X at the right hand side of the yellow bar.
No Input signal
Your device may be ready, but no signal is coming through. Check that your input source is on and connect via a HDMI cable.
HDCP On
For a PlayStation, also make sure that HDCP is turned off. If it is on, your screen may flash between a black screen and No input signal.